Prerequisites
Before you begin, make sure you have:- An Apache Tomcat application server running on a Linux system with administrative access.
- A certificate profile configured with the ACME enrollment method in Infisical.
- Network connectivity from your Tomcat server to Infisical.
- Port 80 open and reachable for ACME HTTP-01 validation.
Guide
Obtain ACME Configuration from Infisical
Navigate to your certificate management project in Infisical and locate your certificate profile configured with the ACME enrollment method.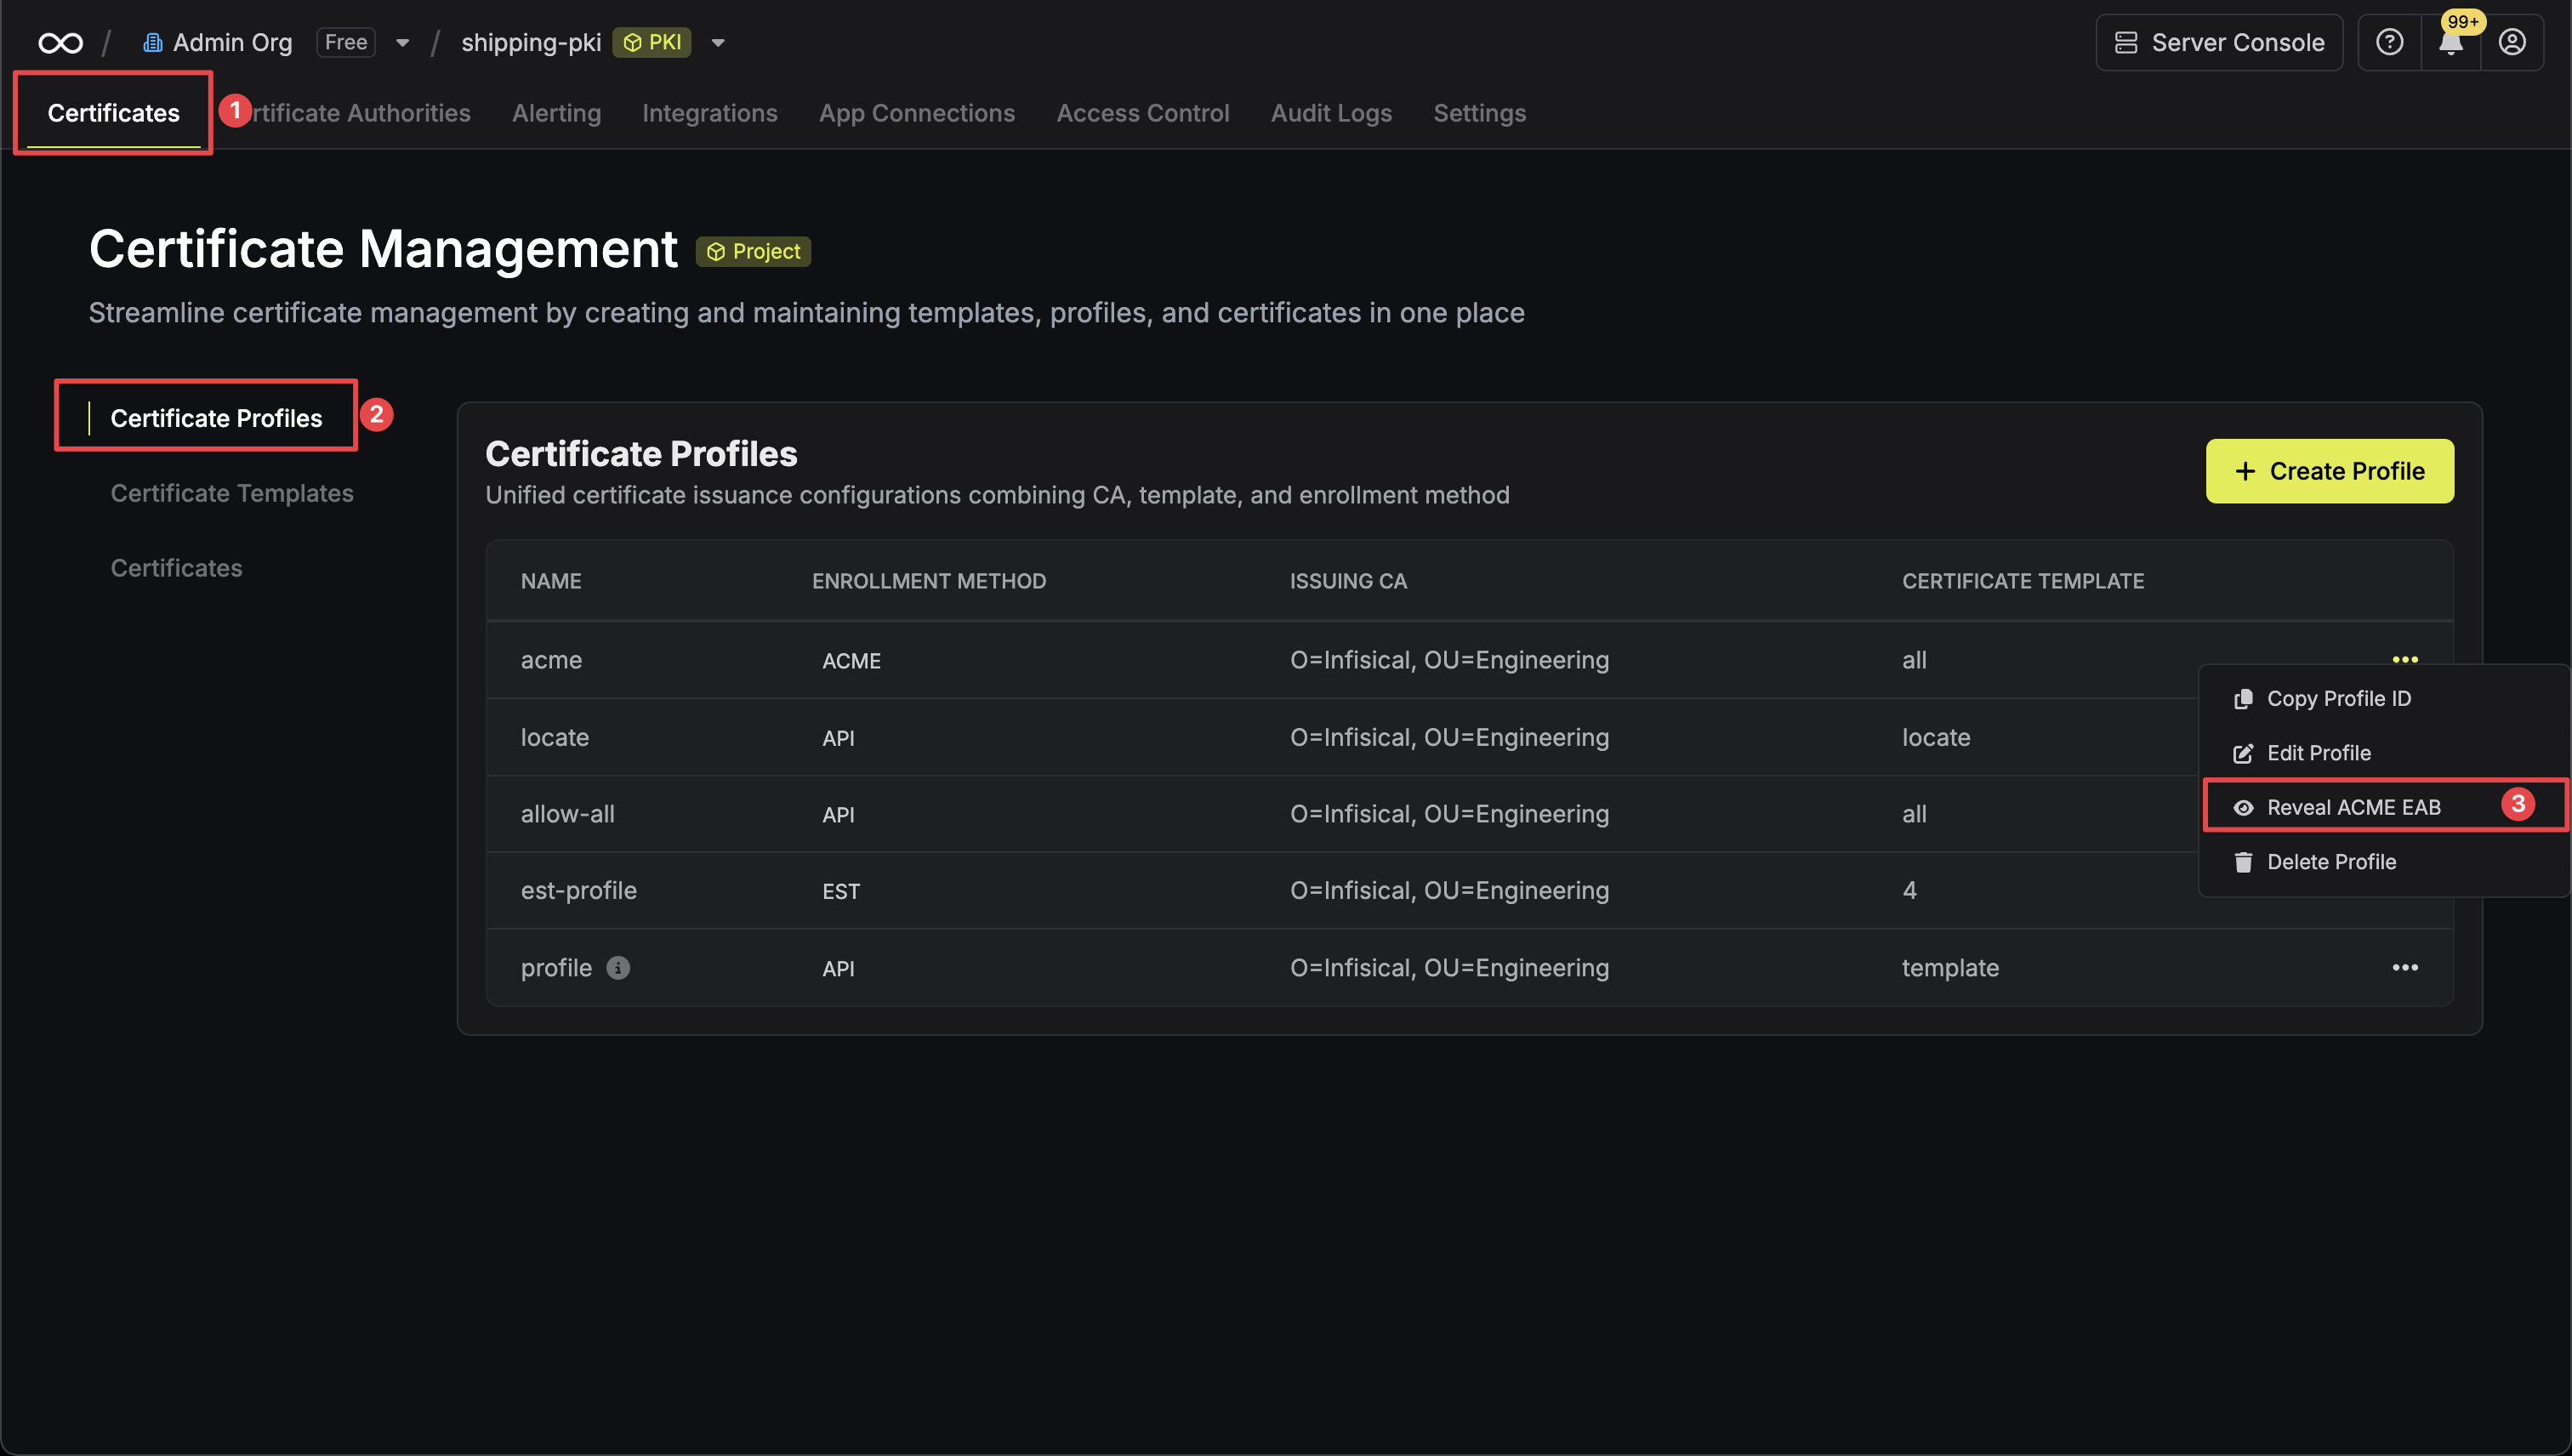 Click the Reveal ACME EAB option to view the ACME configuration details.
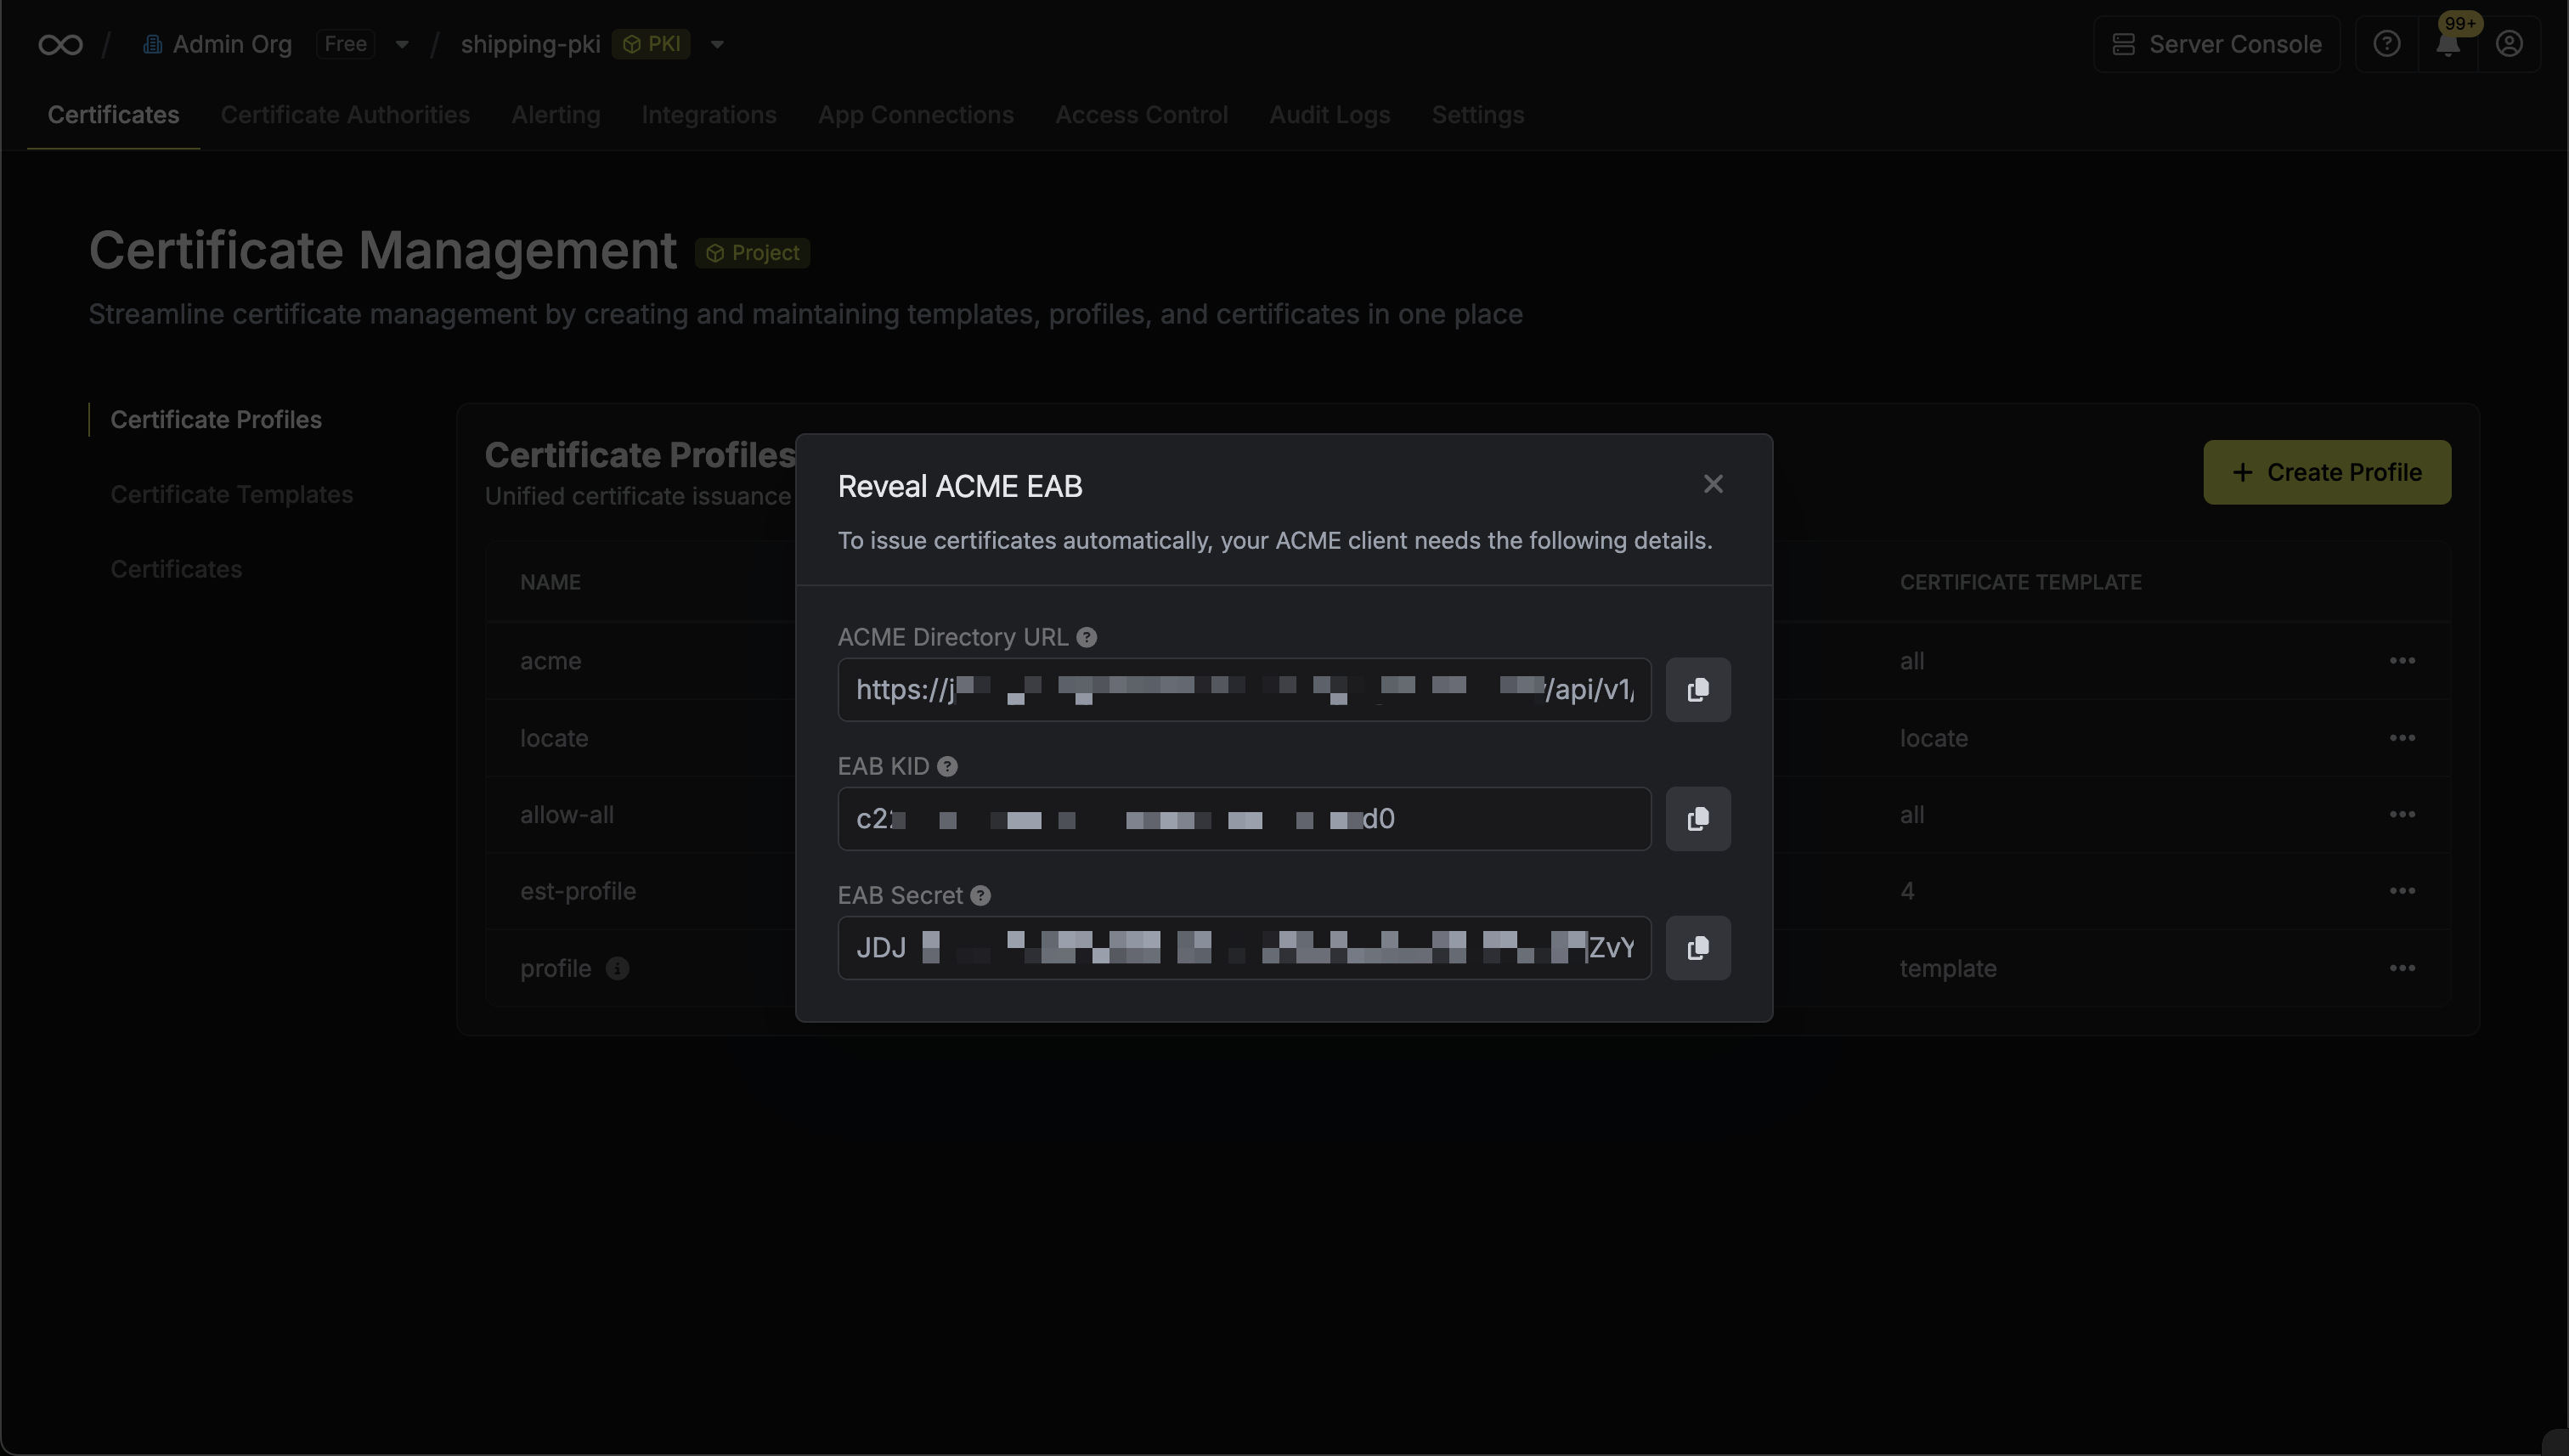 From the ACME configuration, gather the following values:
Click the Reveal ACME EAB option to view the ACME configuration details.From the ACME configuration, gather the following values:- ACME Directory URL: The URL that Certbot will use to communicate with Infisical’s ACME server. This takes the form
https://your-infisical-instance.com/api/v1/cert-manager/certificate-profiles/{profile-id}/acme/directory. - EAB Key Identifier (KID): A unique identifier that tells Infisical which ACME account is making the request.
- EAB Secret: A secret key that authenticates your ACME client with Infisical.
Keep your EAB credentials secure as they authenticate your ACME client with Infisical PKI. These credentials are unique to each certificate profile and should not be shared.
Install Certbot
Install Certbot on the server where Tomcat is running by following the official Certbot installation guide.The installation guide provides up-to-date instructions for various Linux distributions and package managers, ensuring you get the most current version of Certbot.After installation, you can verify that Certbot has been installed correctly by running:
Request Certificate Using Certbot
Since Tomcat doesn’t have a native Certbot plugin, use the standalone authenticator to obtain certificates. Important: You must stop Tomcat before running this command as Certbot needs to bind to port 80 for the HTTP-01 challenge.Stop your Tomcat server:Run the following command to request a certificate from Infisical:For guidance on each parameter:
certonly: Instructs Certbot to request a certificate without modifying your Tomcat configuration; this mode is recommended because Tomcat requires manual SSL connector configuration in its server.xml file.--standalone: Uses Certbot’s standalone authenticator to solve the HTTP-01 challenge by starting a temporary web server on port 80.--server: The Infisical ACME directory URL from Step 1. This instructs Certbot to communicate with Infisical’s ACME server instead of Let’s Encrypt.--eab-kid: Your External Account Binding (EAB) Key Identifier from Step 1.--eab-hmac-key: The EAB secret associated with the KID from Step 1.-d: Specifies the domain name for which the certificate is being requested.--email: The contact email for expiration notices and account recovery.--agree-tos: Accepts the ACME server’s Terms of Service.--non-interactive: Runs Certbot without prompting for user input (recommended for automation).
/etc/letsencrypt/live/{domain-name}/.Because Tomcat requires manual SSL configuration, you’ll need to configure the SSL connector in your Tomcat server.xml file to reference these certificate files. You can restart Tomcat after the certificate is issued, but SSL won’t be enabled until you complete the server configuration.Configure Tomcat SSL Connector
To enable SSL/TLS in Tomcat, you need to configure an SSL connector in the server.xml configuration file. Tomcat can use the PEM certificates directly without conversion to Java keystore format (available in Tomcat 8.5+ with the NIO or NIO2 connector).Edit your Tomcat server.xml file (typically located at Restart Tomcat to apply the SSL configuration:You can verify SSL is working by accessing your Tomcat application at
/opt/tomcat/conf/server.xml or /usr/share/tomcat/conf/server.xml):https://example.infisical.com:8443. For production deployments, consider configuring a reverse proxy (like Apache HTTP Server or Nginx) to handle SSL termination on standard port 443.The certificate paths must be readable by the Tomcat user. You may need to adjust file permissions or copy the certificates to a location accessible by Tomcat. For security, ensure the private key file has restricted permissions (600) and is owned by the Tomcat user.
Verify Certificate Installation
After configuring Tomcat SSL, verify that your certificate was issued correctly and Tomcat is serving it properly.Check that the certificate files were created by Certbot:You should see files like:
cert.pem(your certificate)chain.pem(certificate chain)fullchain.pem(certificate + chain)privkey.pem(private key)
Renew Your Certificate with Certbot
Unlike web servers with native Certbot plugins, Tomcat certificate renewal requires stopping the server, renewing the certificate, and restarting to load the new certificates.To test the renewal process without affecting your live certificates, run the following command:This command simulates the full renewal process without modifying your active certificate. If the dry run succeeds, the renewal mechanism will work as expected.For actual renewal, since Tomcat requires the standalone authenticator, you’ll need to stop the server, perform the renewal, and restart:Important considerations for Tomcat renewal:Because Tomcat uses the standalone authenticator, the server must be stopped during renewal. This creates a service interruption that requires manual coordination:Make the hook executable:
- Plan maintenance windows for certificate renewals (typically every 60-90 days)
- Monitor renewal dates to schedule downtime appropriately
- Consider load balancers or multiple instances for high availability during renewals
/etc/letsencrypt/renewal-hooks/deploy/tomcat-renewal.sh:Certbot automatically renews certificates when they are within 30 days of expiration using its built-in systemd timer. The deploy hook above will run after each successful renewal, handling the certificate permissions and service restart automatically. Because Tomcat requires the standalone authenticator (which stops the service temporarily), plan for brief service interruptions during renewal.
Using Renewed Certificates Manually
If you need to manually apply renewed certificates to Tomcat (when the deploy hook isn’t used), follow these steps:Step 1: Set certificate file permissionsAfter Certbot renews your certificates, ensure they’re readable by Tomcat:Step 2: Restart Tomcat to load new certificatesThat’s it! Tomcat will automatically use the renewed certificates since your
server.xml already points to the Let’s Encrypt certificate files.Since Tomcat reads certificates from the file system on startup, you only need to restart the service after certificate renewal. The certificate file paths in
/etc/letsencrypt/live/ are symbolic links that automatically point to the latest certificates.