> ## Documentation Index
> Fetch the complete documentation index at: https://infisical.com/docs/llms.txt
> Use this file to discover all available pages before exploring further.
# Azure DNS Connection
> Learn how to configure an Azure DNS Connection for Infisical.
Infisical supports connecting to Azure DNS using a Service Principal with Client Secrets for secure access to manage DNS records in your Azure DNS zones.
To use client secret authentication, ensure your Azure Service Principal has the required permissions to manage DNS records in your Azure DNS Zone.
If you want to configure automatic client secret rotation for this App Connection, you also need to grant either `Application.ReadWrite.OwnedBy` or `Application.ReadWrite.All` permissions.
**Prerequisites:**
* Set up Azure and have an existing DNS Zone.
* An Azure Service Principal (App Registration) with a Client Secret.
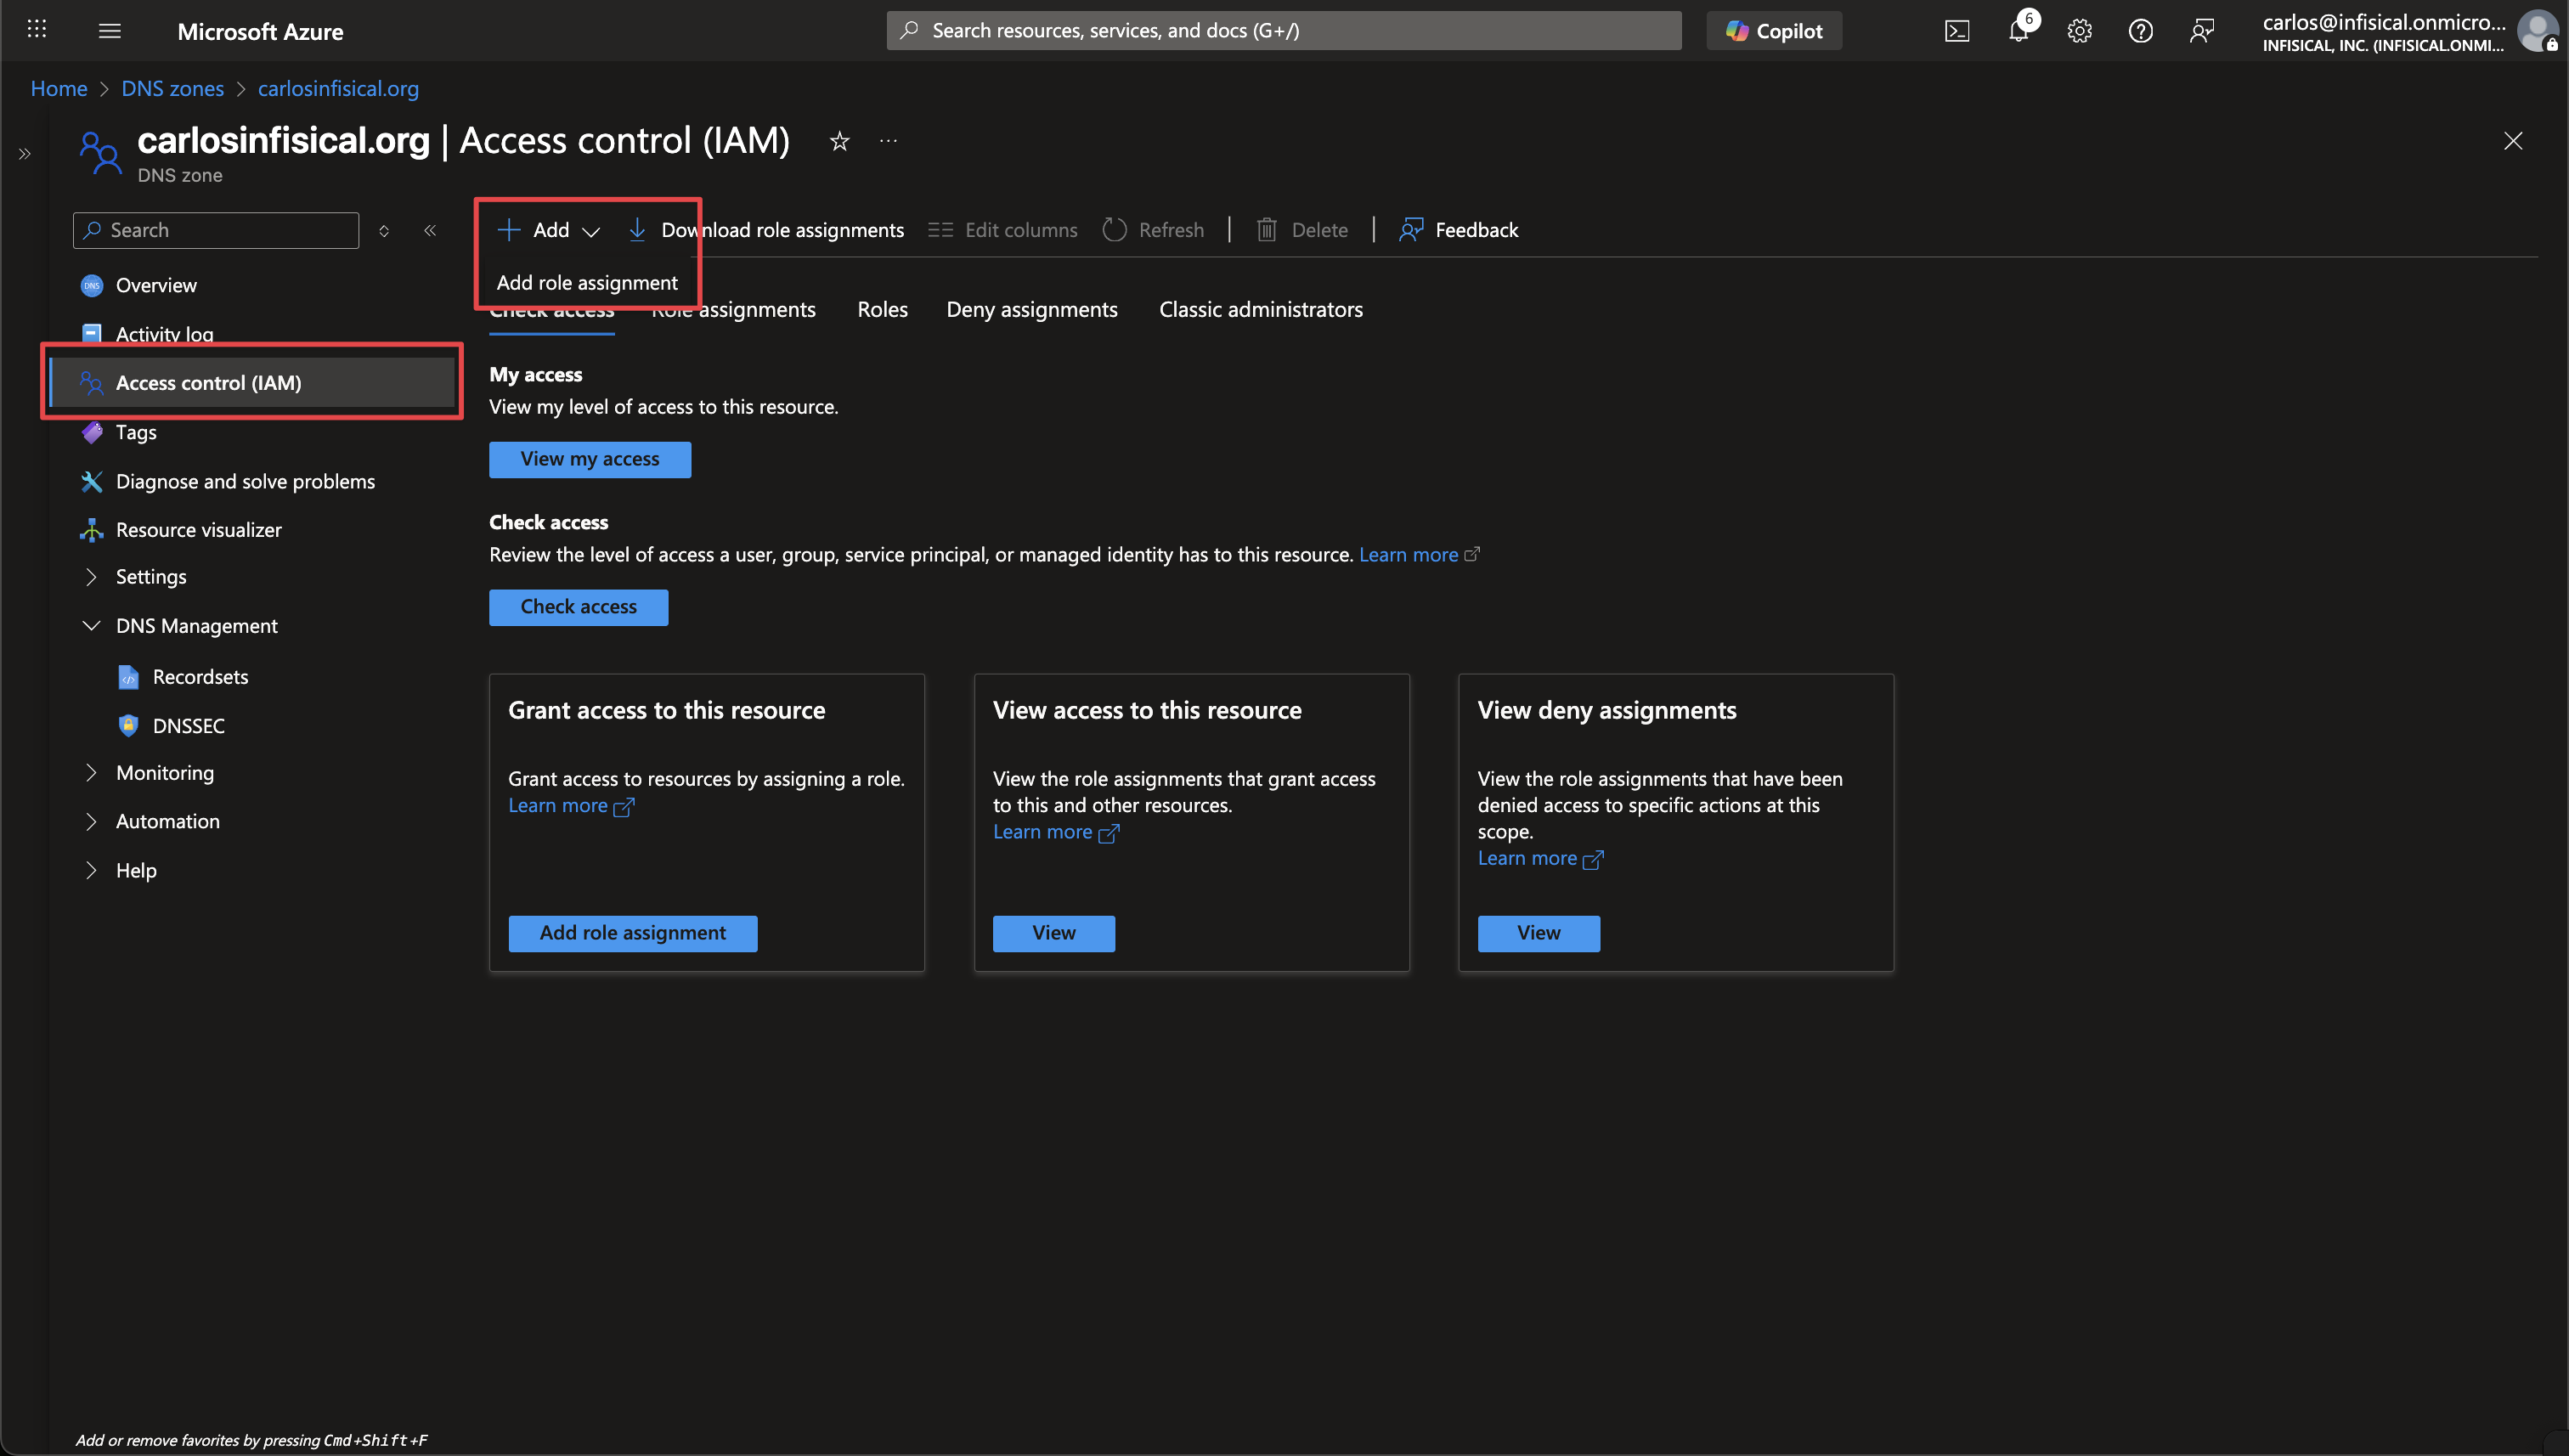
In the Azure Portal, navigate to your DNS Zone that you want to use for ACME DNS validation. Click on **Access control (IAM)** in the left sidebar, then click **Add** > **Add role assignment**.
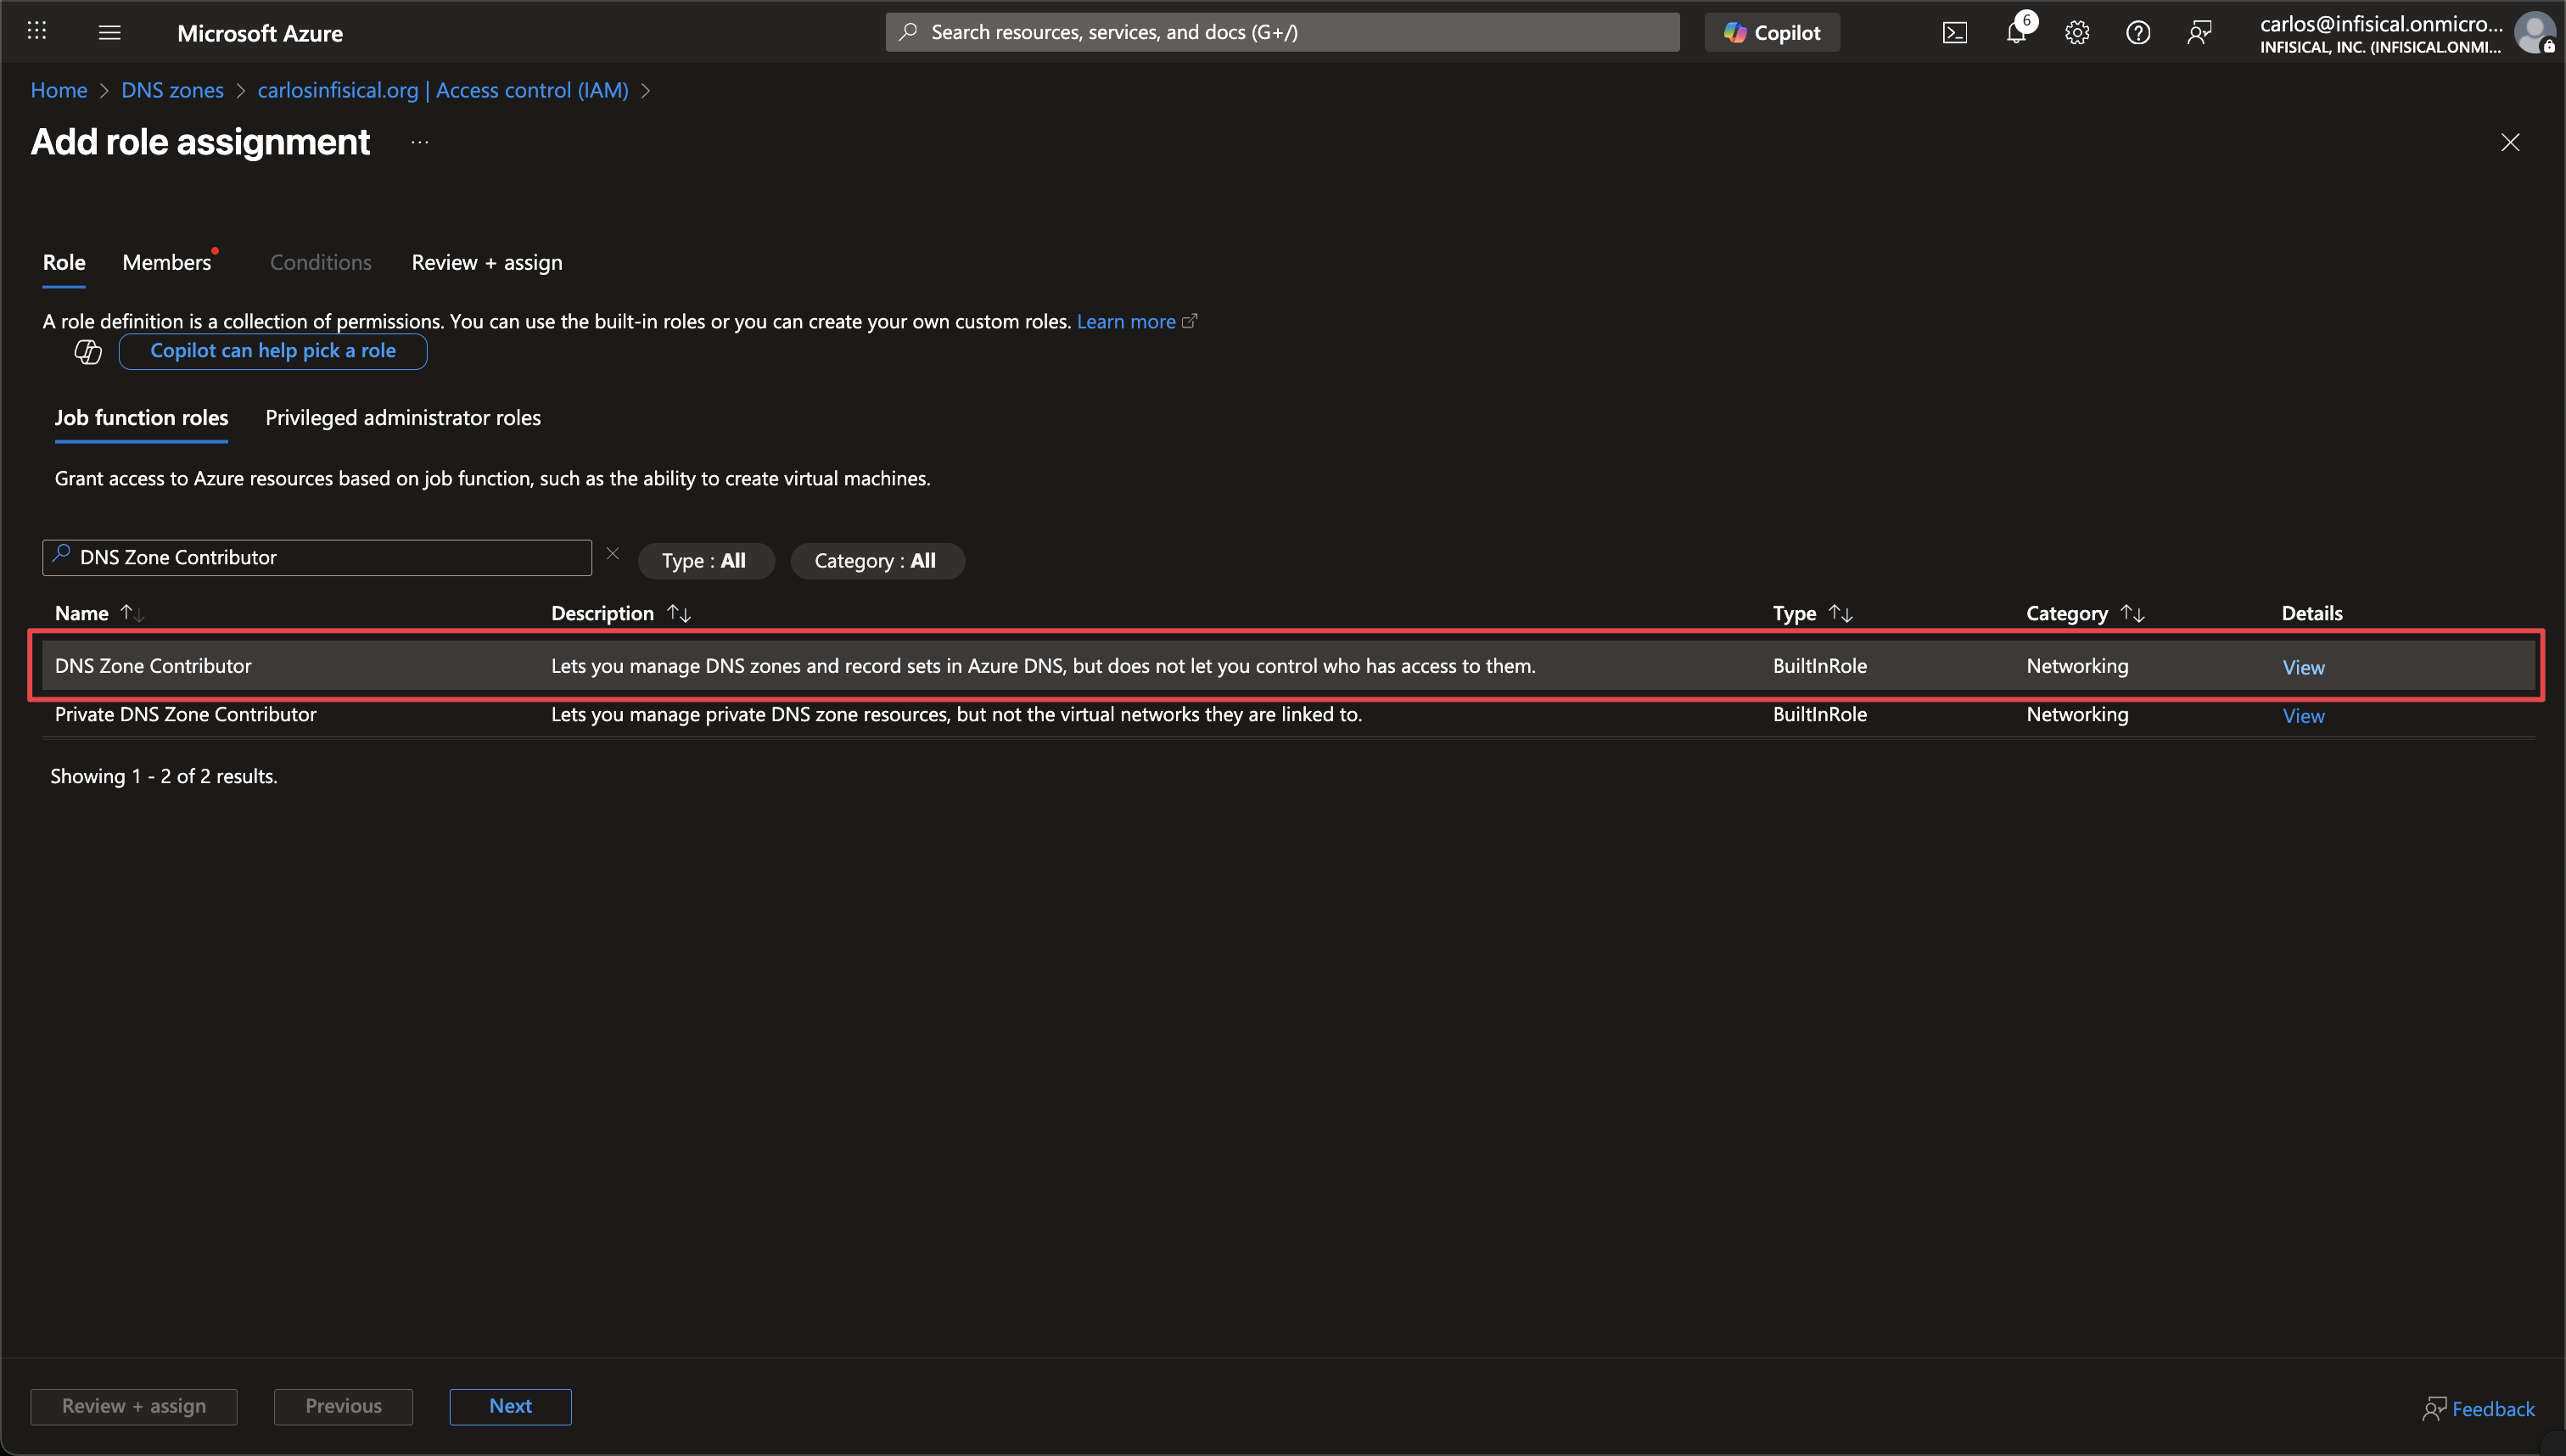
 Search for and select the **DNS Zone Contributor** role, then click **Next**.
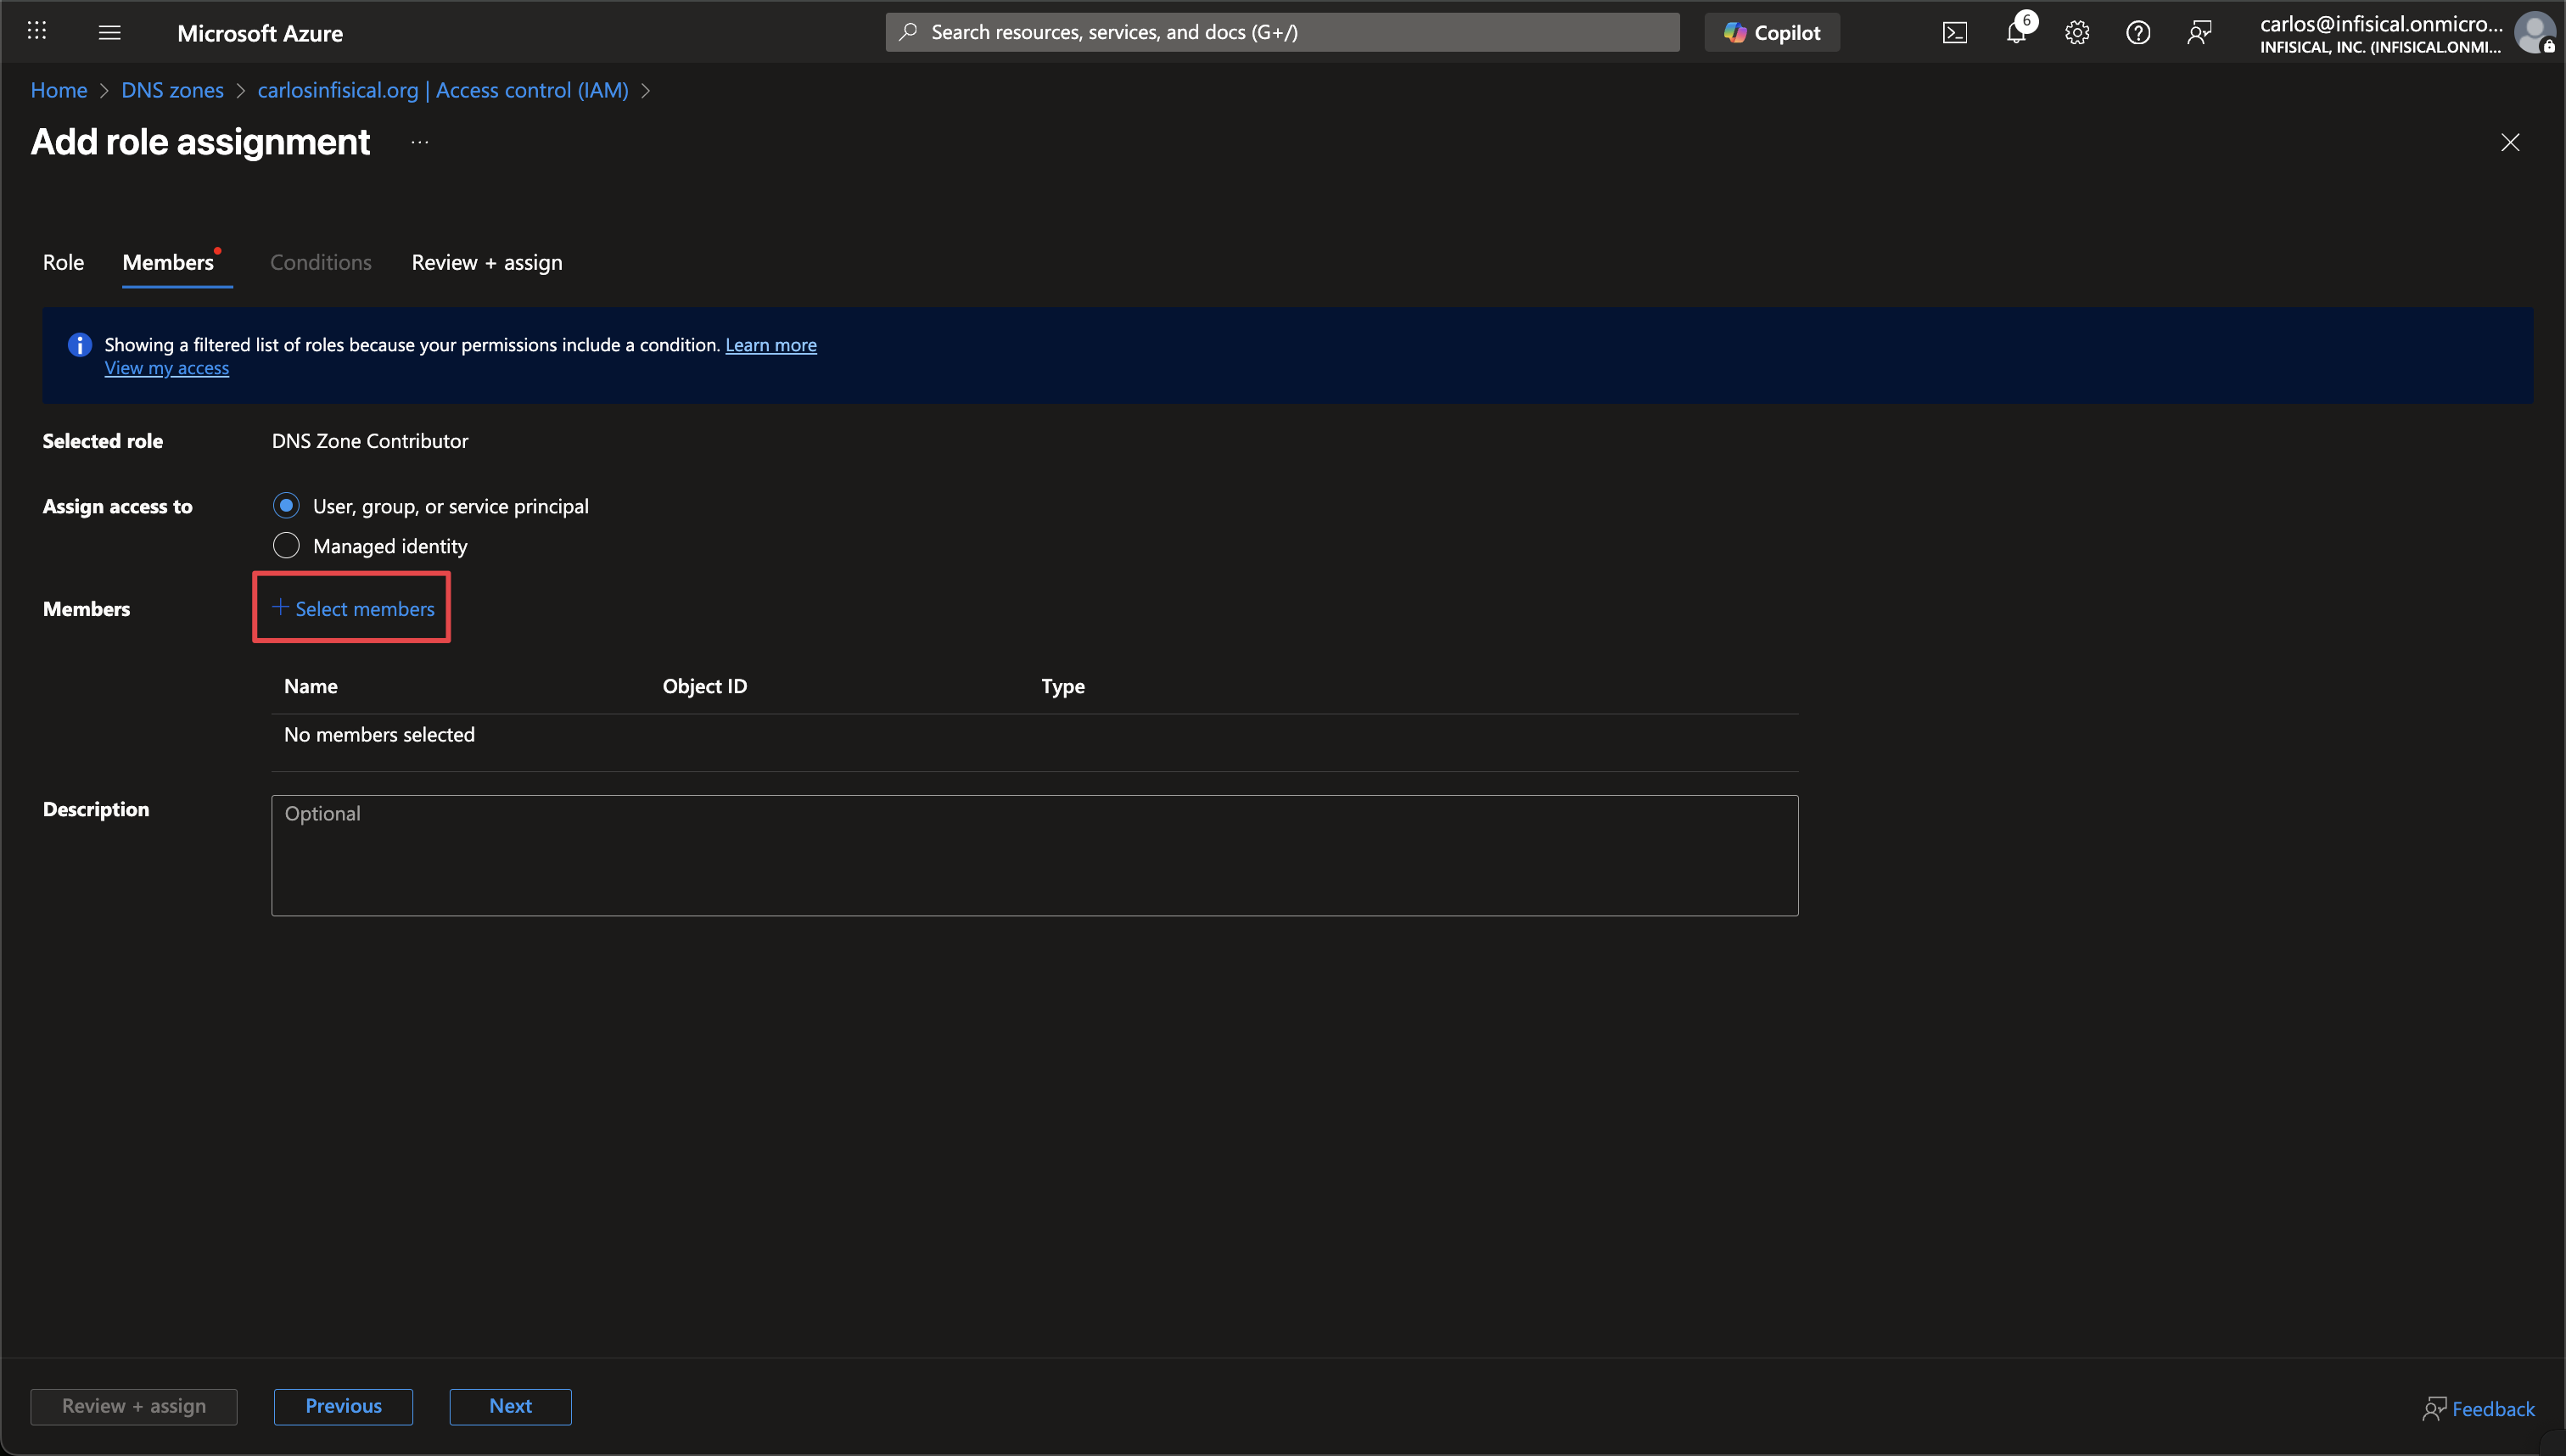
 Click **Select members**, search for your App Registration (Service Principal), select it, and click **Select**.
 Click **Review + assign** to complete the role assignment.
## Setup Azure DNS Connection in Infisical
Navigate to the **App Connections** page in the desired project.
Click **Review + assign** to complete the role assignment.
## Setup Azure DNS Connection in Infisical
Navigate to the **App Connections** page in the desired project.
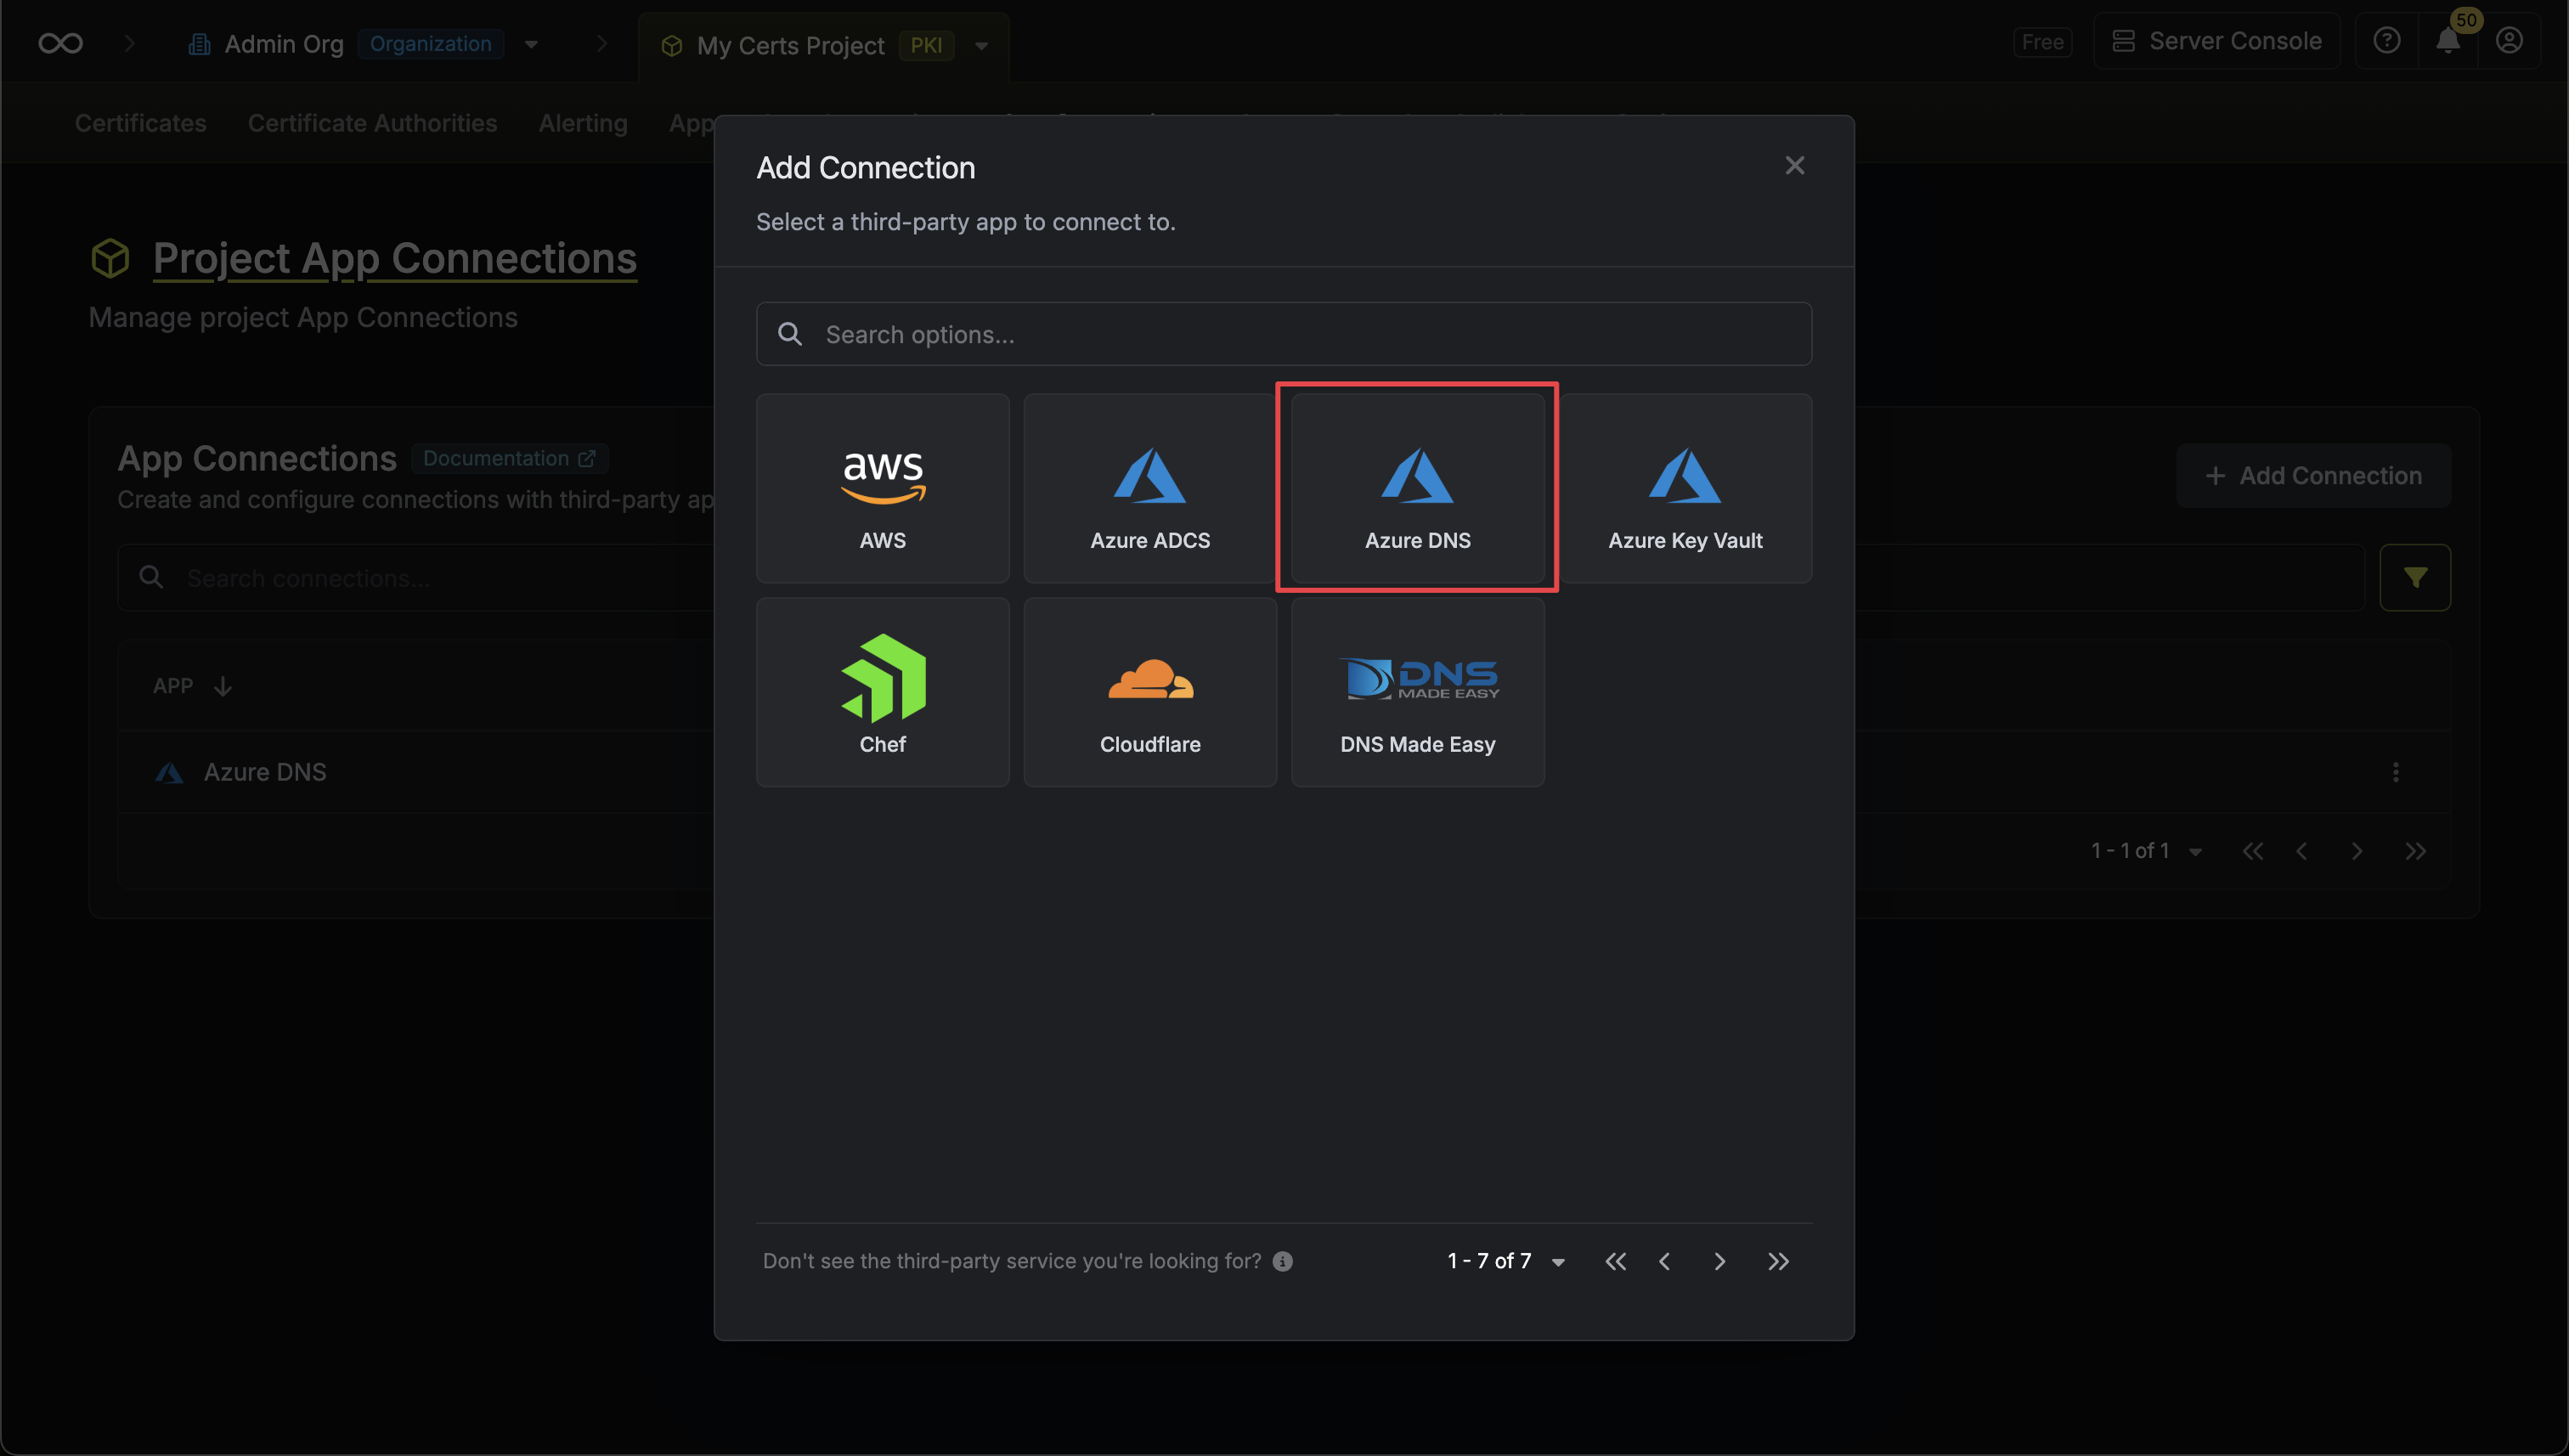
 Select the **Azure DNS Connection** option from the connection options modal.
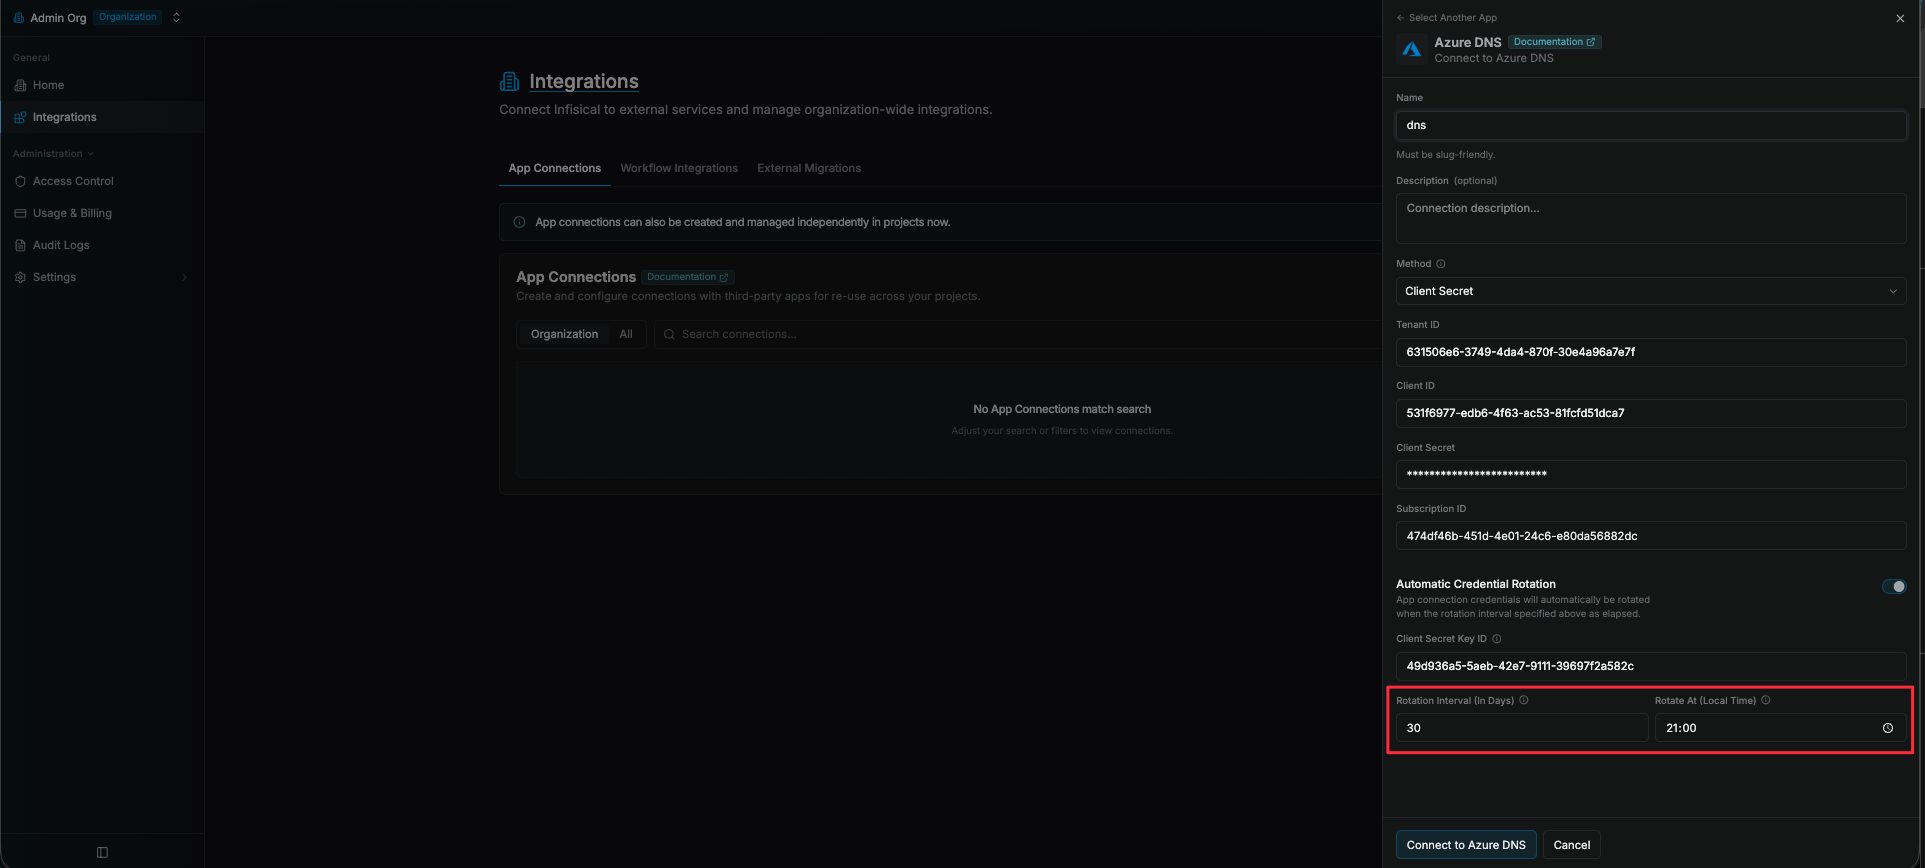
 Fill in the **Tenant ID**, **Client ID**, **Client Secret**, and **Subscription ID** fields with the credentials from your Azure Service Principal.
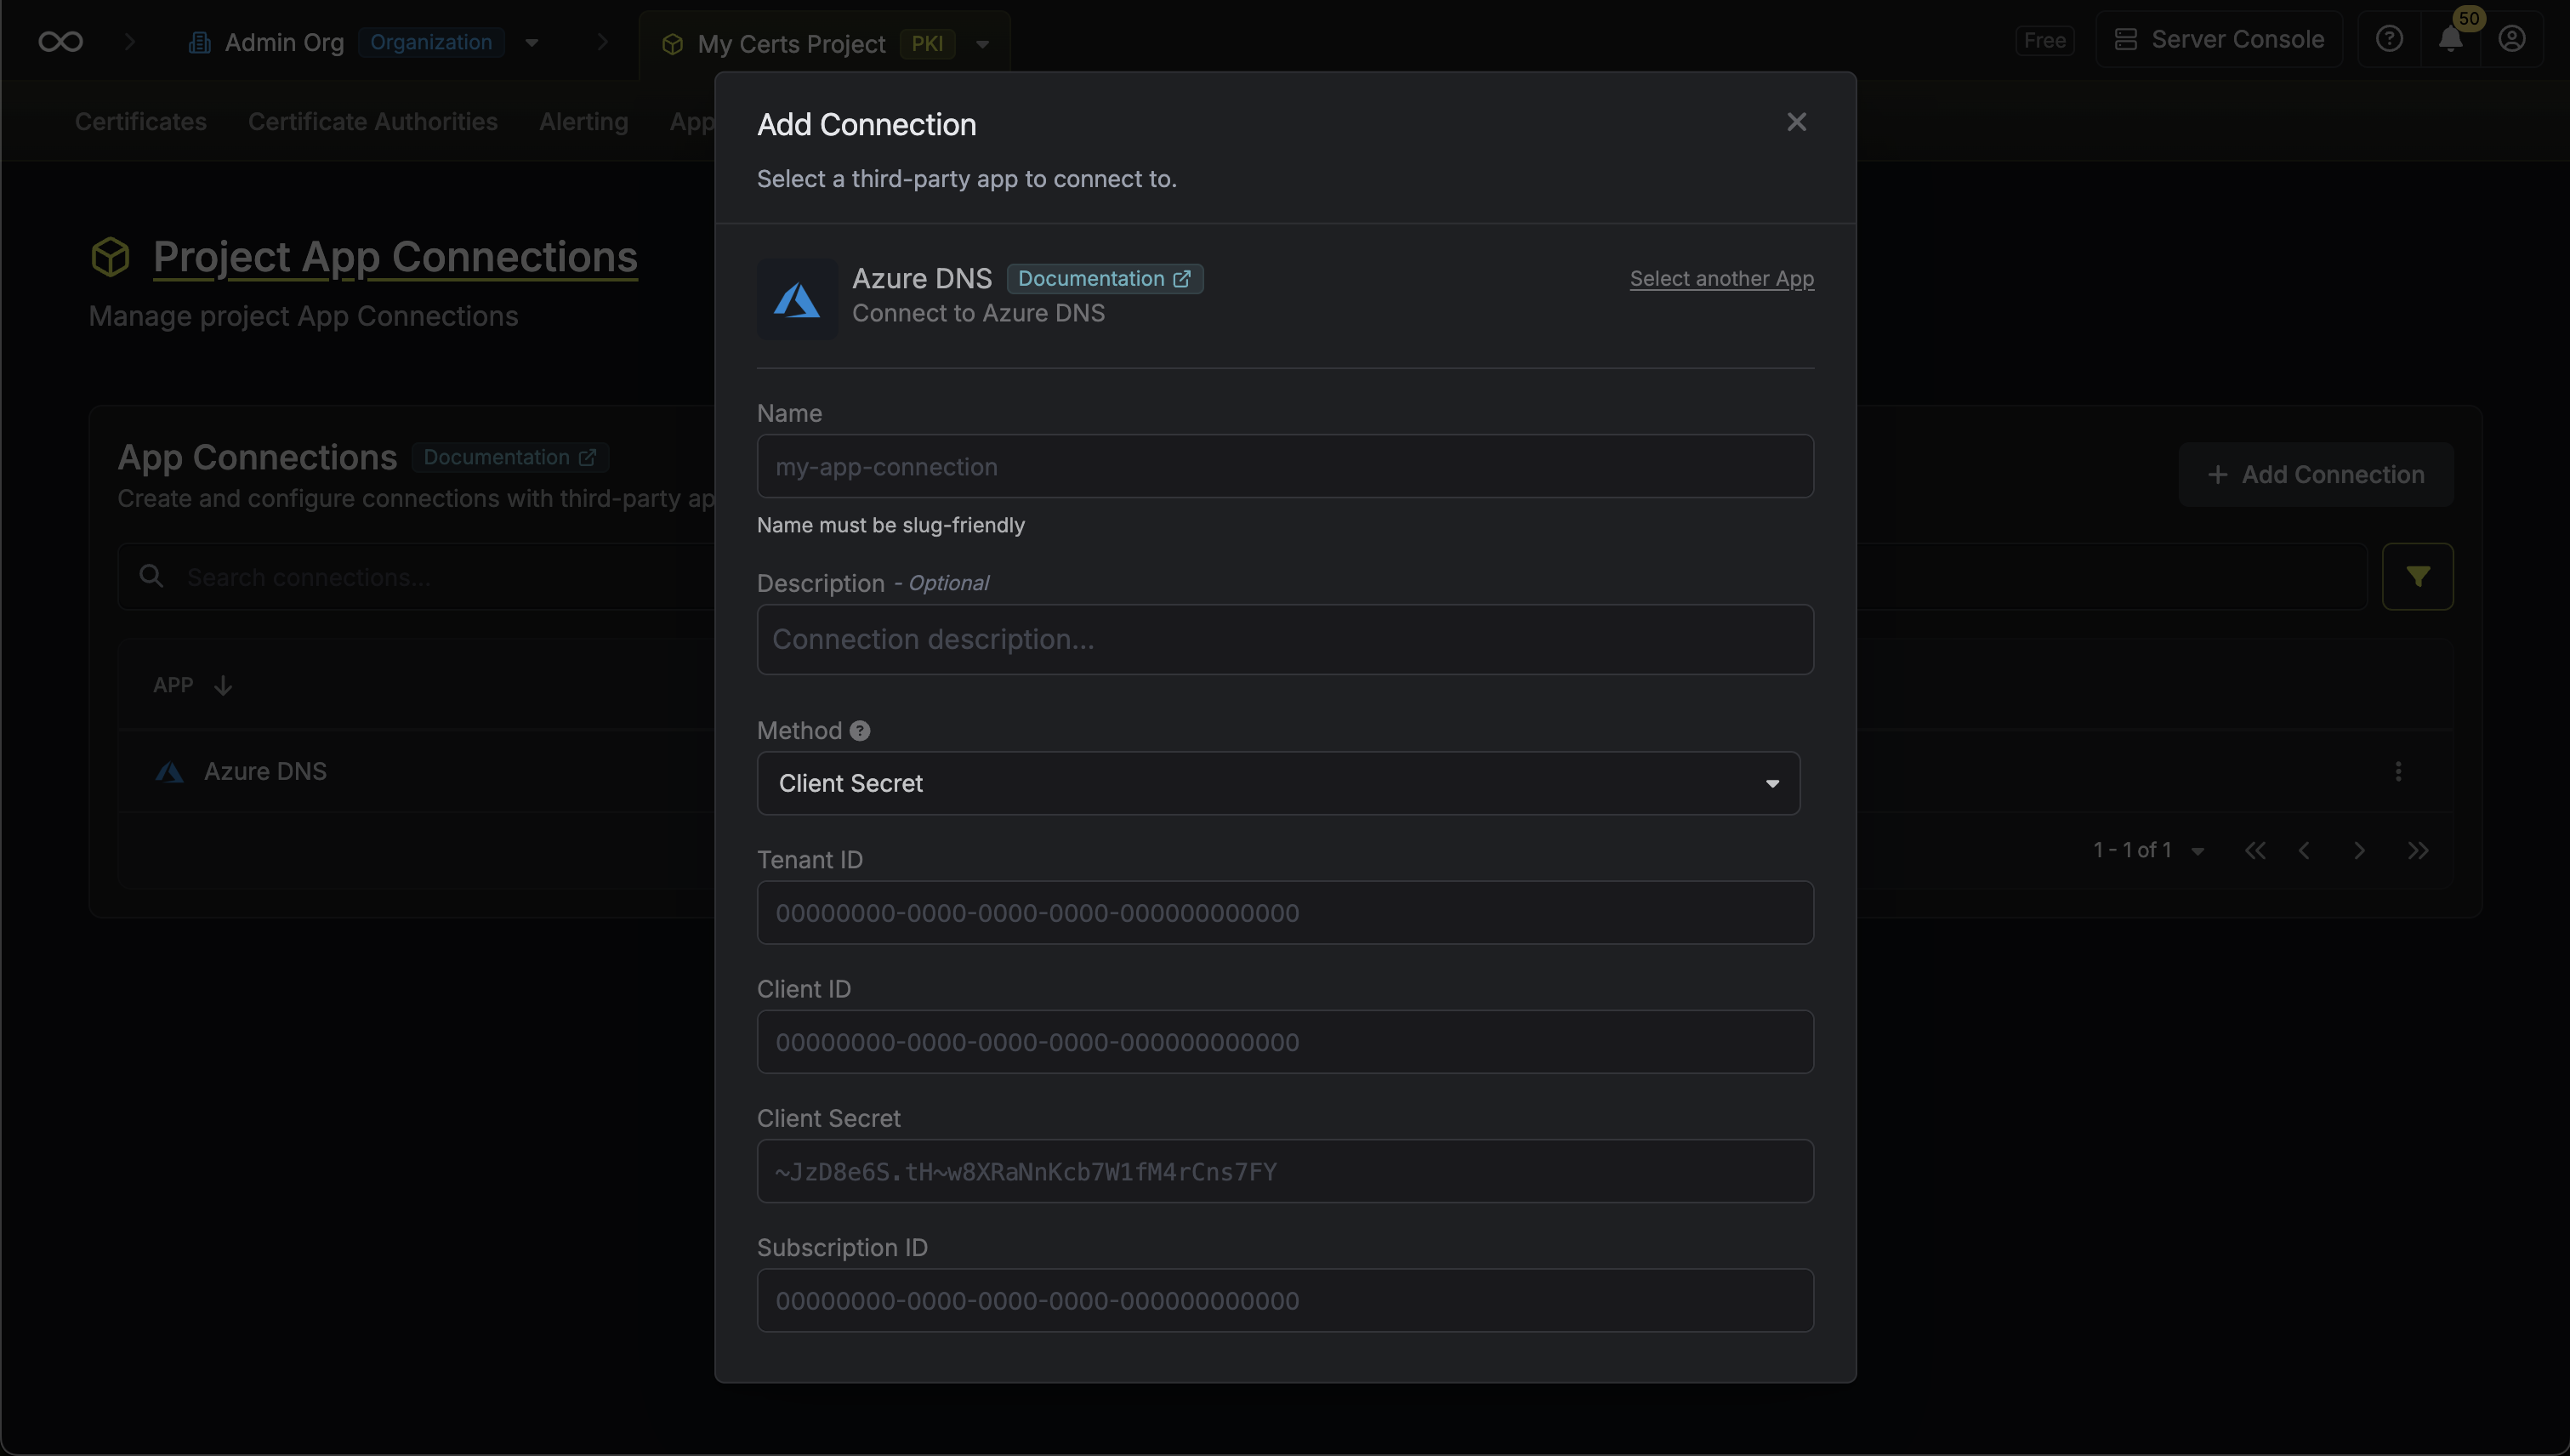 You can find your **Subscription ID** in the Azure Portal under **Subscriptions**. The **Tenant ID** and **Client ID** can be found in your App Registration's **Overview** page.
You can optionally enable **Automatic Credential Rotation** for this connection. See the [Automatic Credential Rotation](#automatic-credential-rotation) section below for details.
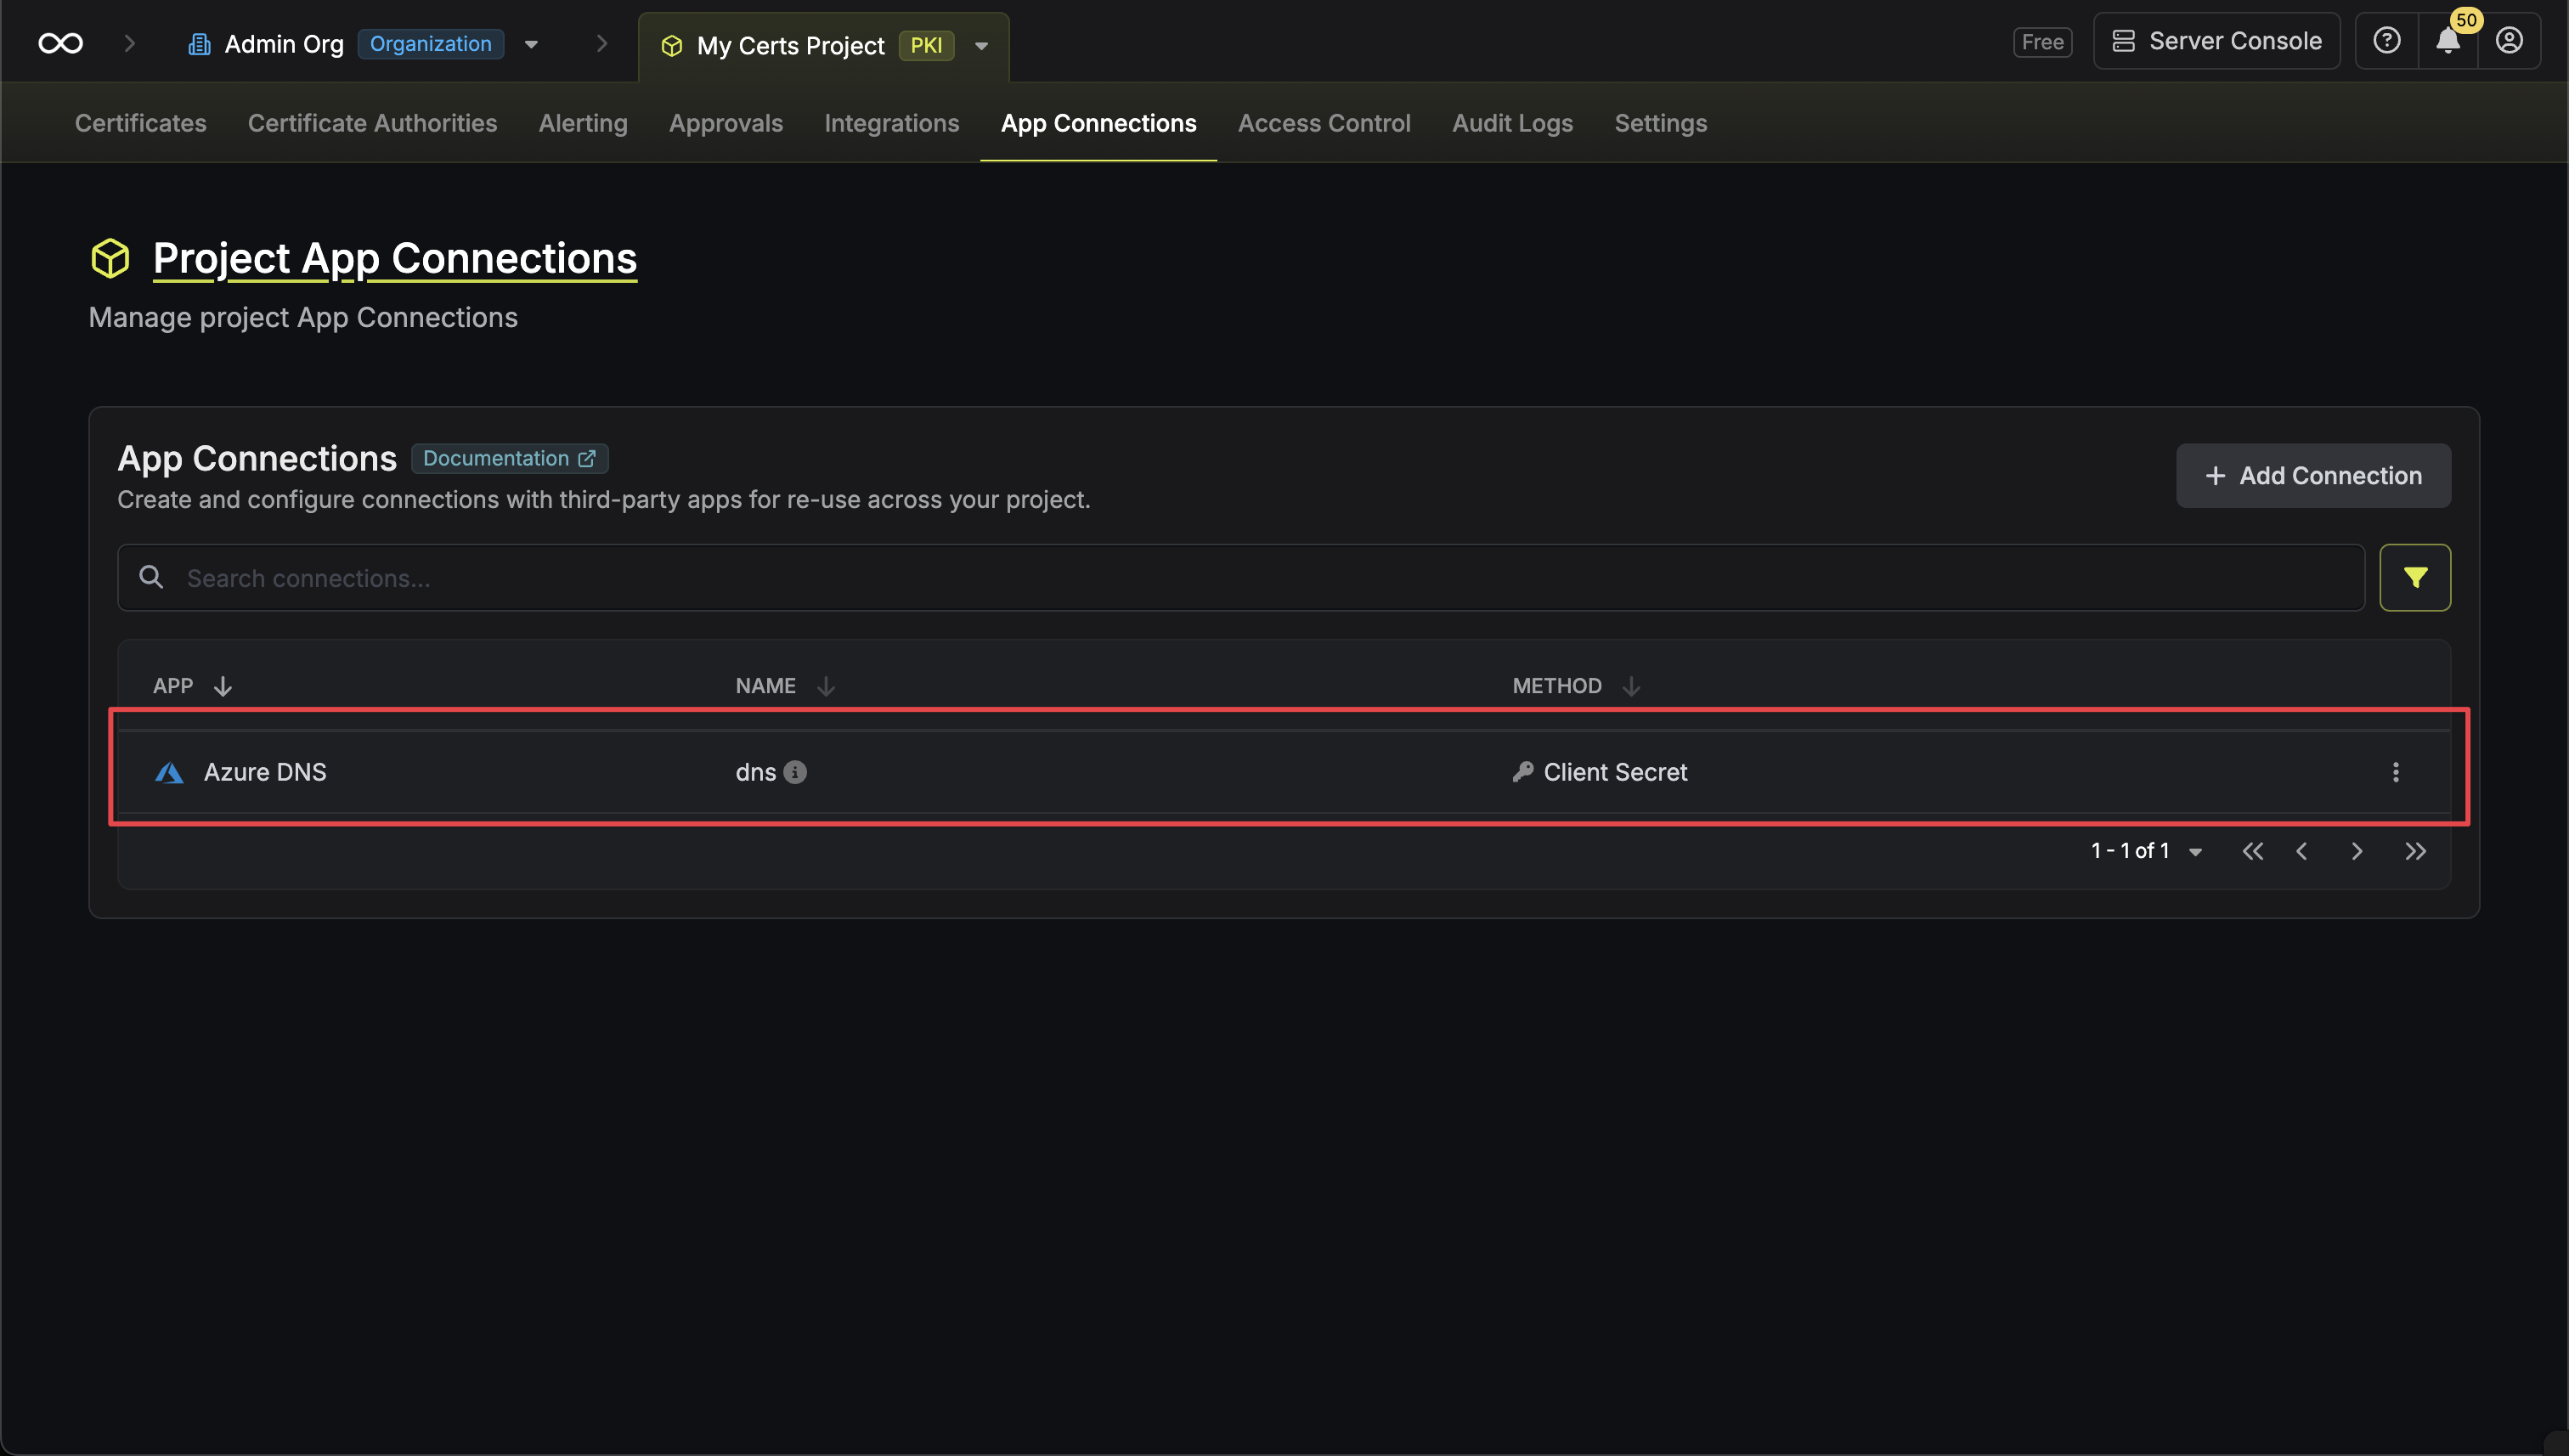
Your **Azure DNS Connection** is now available for use in your Infisical projects.
You can find your **Subscription ID** in the Azure Portal under **Subscriptions**. The **Tenant ID** and **Client ID** can be found in your App Registration's **Overview** page.
You can optionally enable **Automatic Credential Rotation** for this connection. See the [Automatic Credential Rotation](#automatic-credential-rotation) section below for details.
Your **Azure DNS Connection** is now available for use in your Infisical projects.
 ## Automatic Credential Rotation
Infisical can automatically rotate the Client Secret of your Azure application on a recurring schedule. When enabled, Infisical will immediately generate a new Client Secret on connection creation and revoke the original one, ensuring that no external party retains access using the credentials you provided.
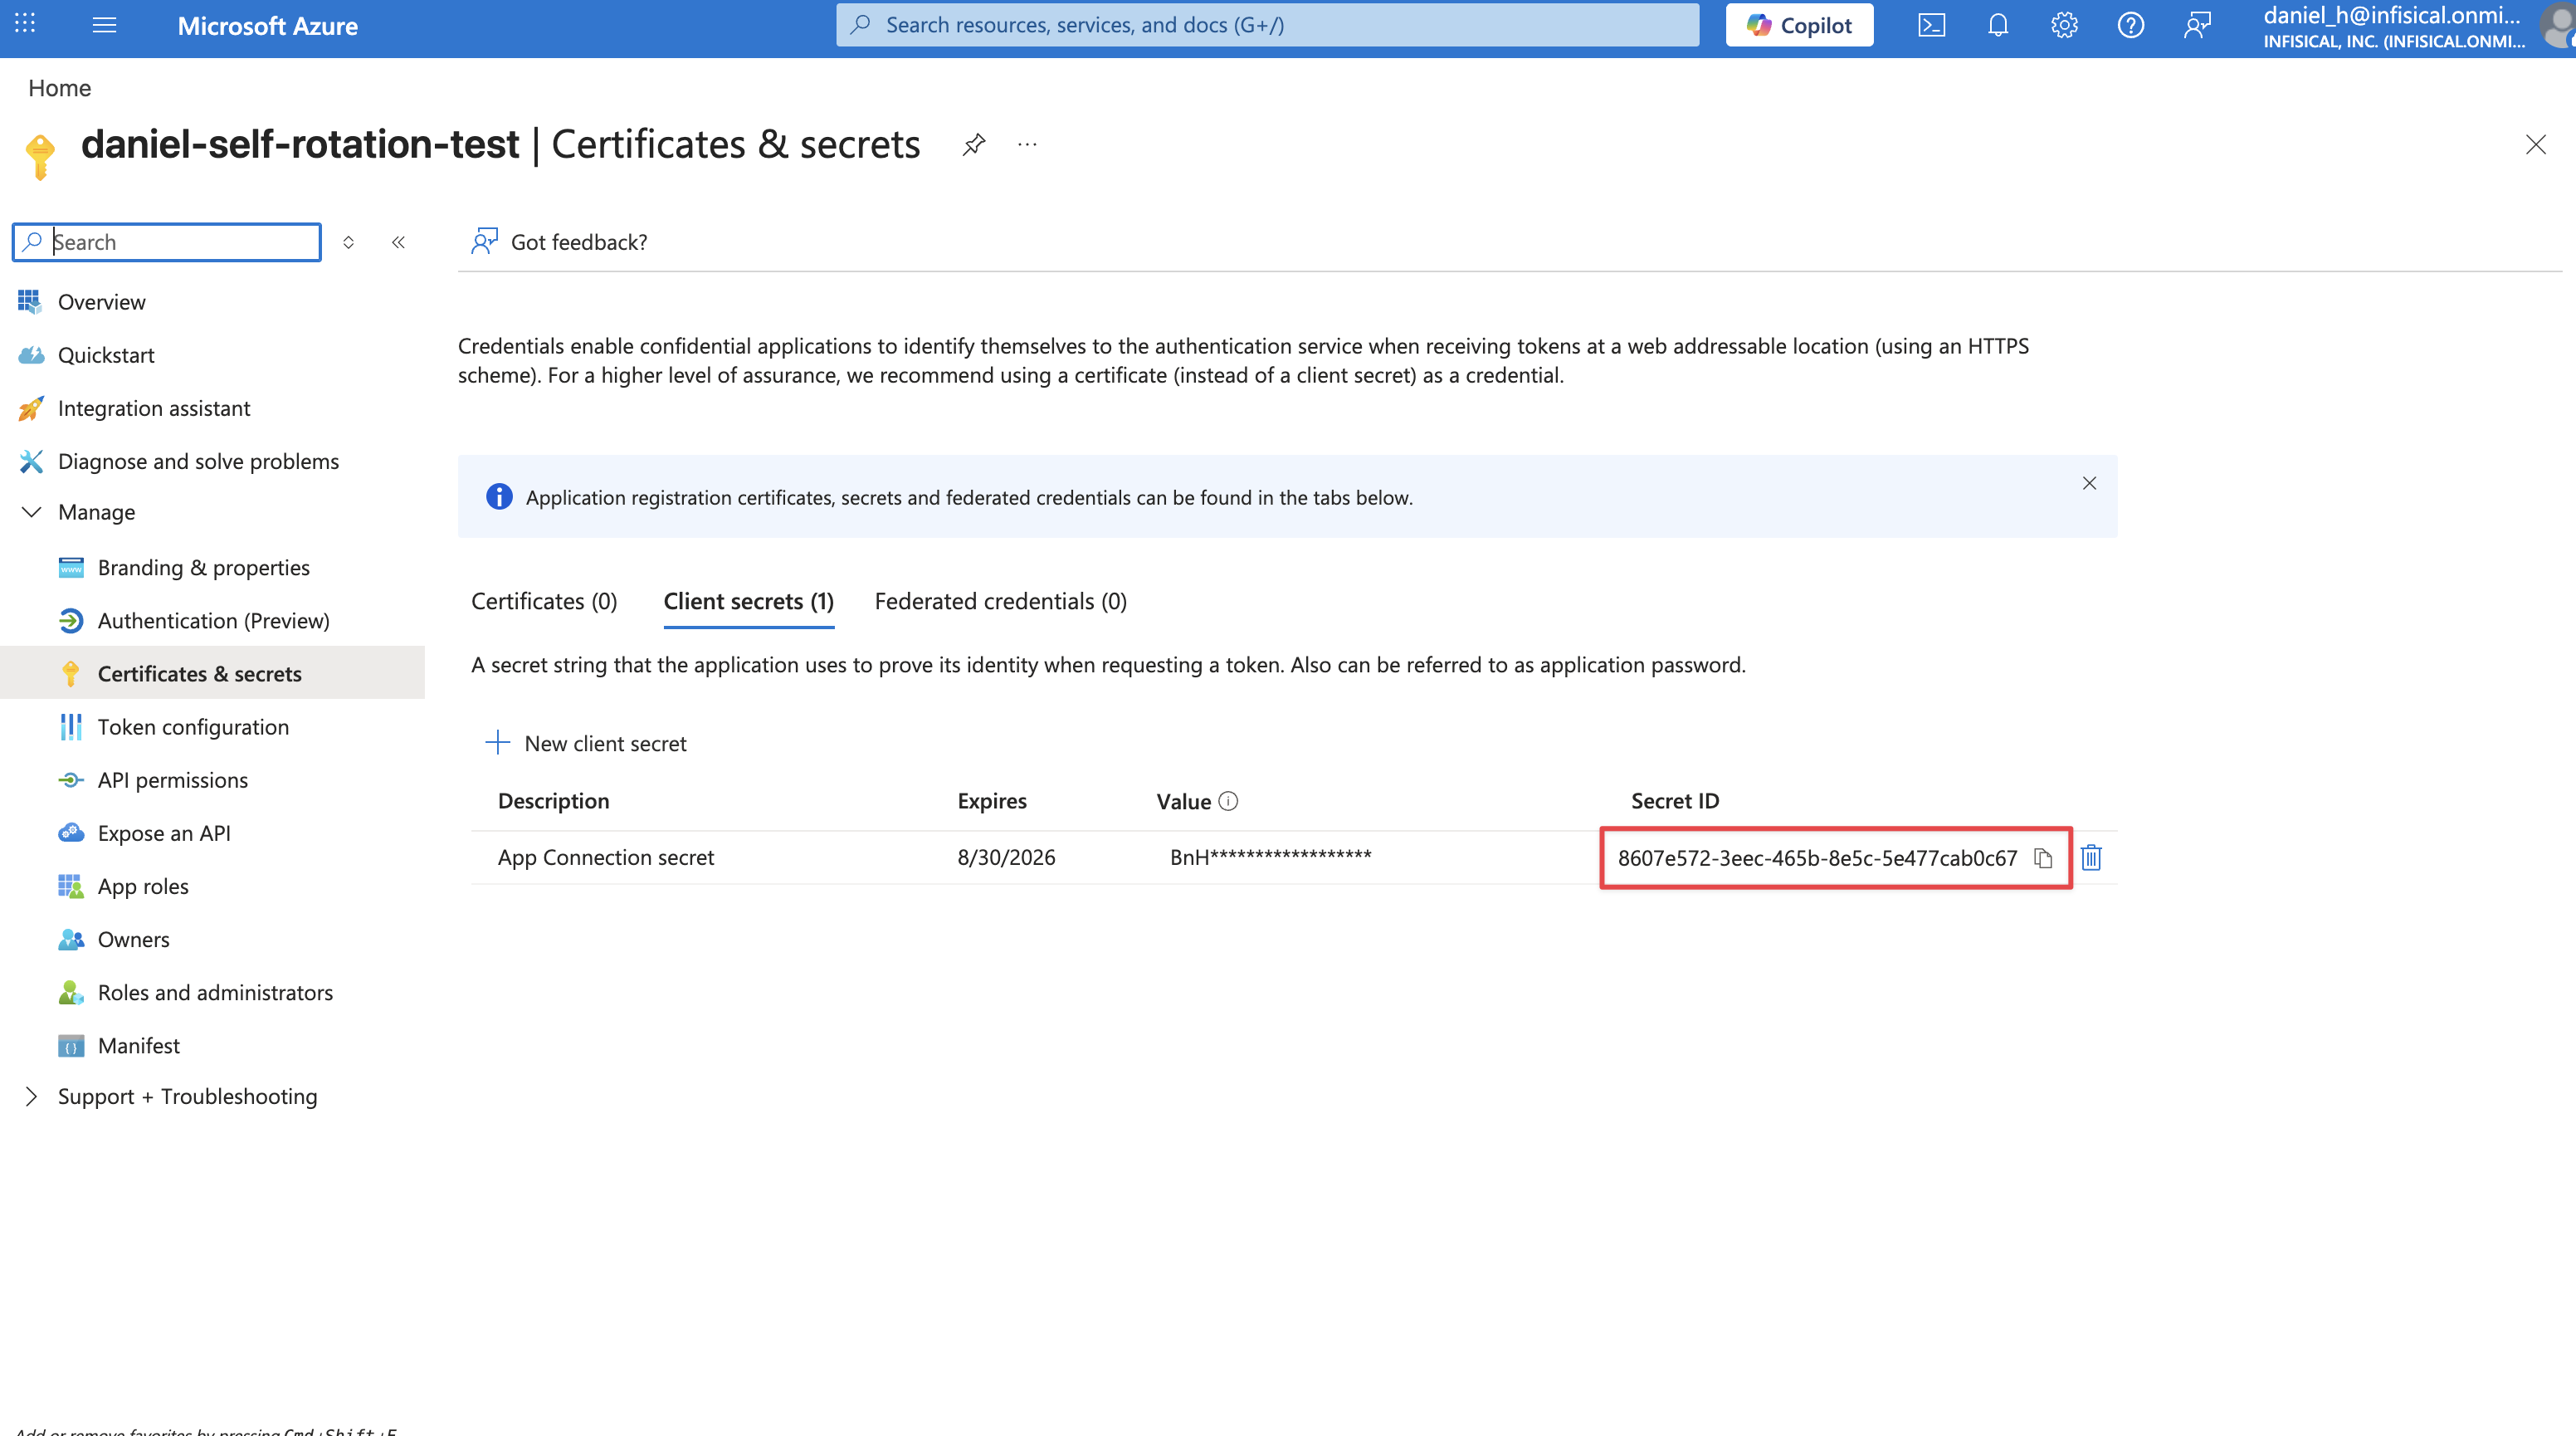
Before enabling rotation, you'll need the **Key ID** of the Client Secret you are using to authenticate. Navigate to your App Registration in the Azure Portal, then go to **Certificates & secrets**. Copy the **Secret ID** (Key ID) of the secret you are providing to Infisical.
## Automatic Credential Rotation
Infisical can automatically rotate the Client Secret of your Azure application on a recurring schedule. When enabled, Infisical will immediately generate a new Client Secret on connection creation and revoke the original one, ensuring that no external party retains access using the credentials you provided.
Before enabling rotation, you'll need the **Key ID** of the Client Secret you are using to authenticate. Navigate to your App Registration in the Azure Portal, then go to **Certificates & secrets**. Copy the **Secret ID** (Key ID) of the secret you are providing to Infisical.
 When creating or editing your connection, toggle on the **Automatic Credential Rotation** switch.
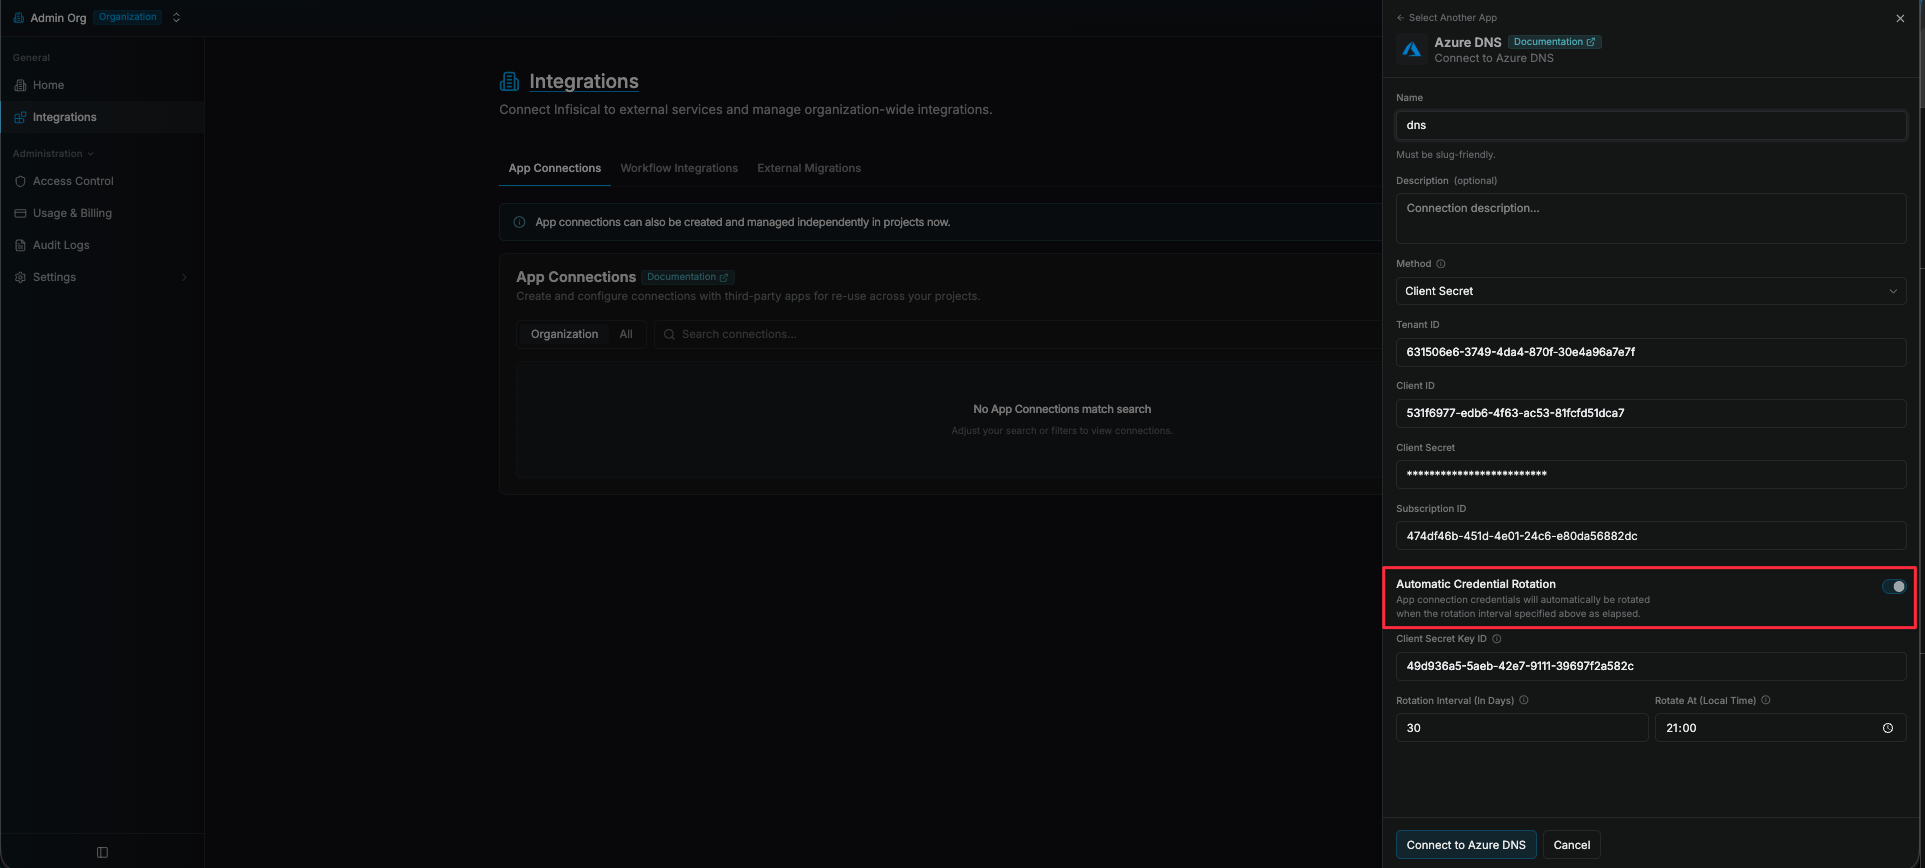 Enter the **Key ID** you copied in the previous step into the **Client Secret Key ID** field. Infisical uses this to revoke your original secret after generating a new one.
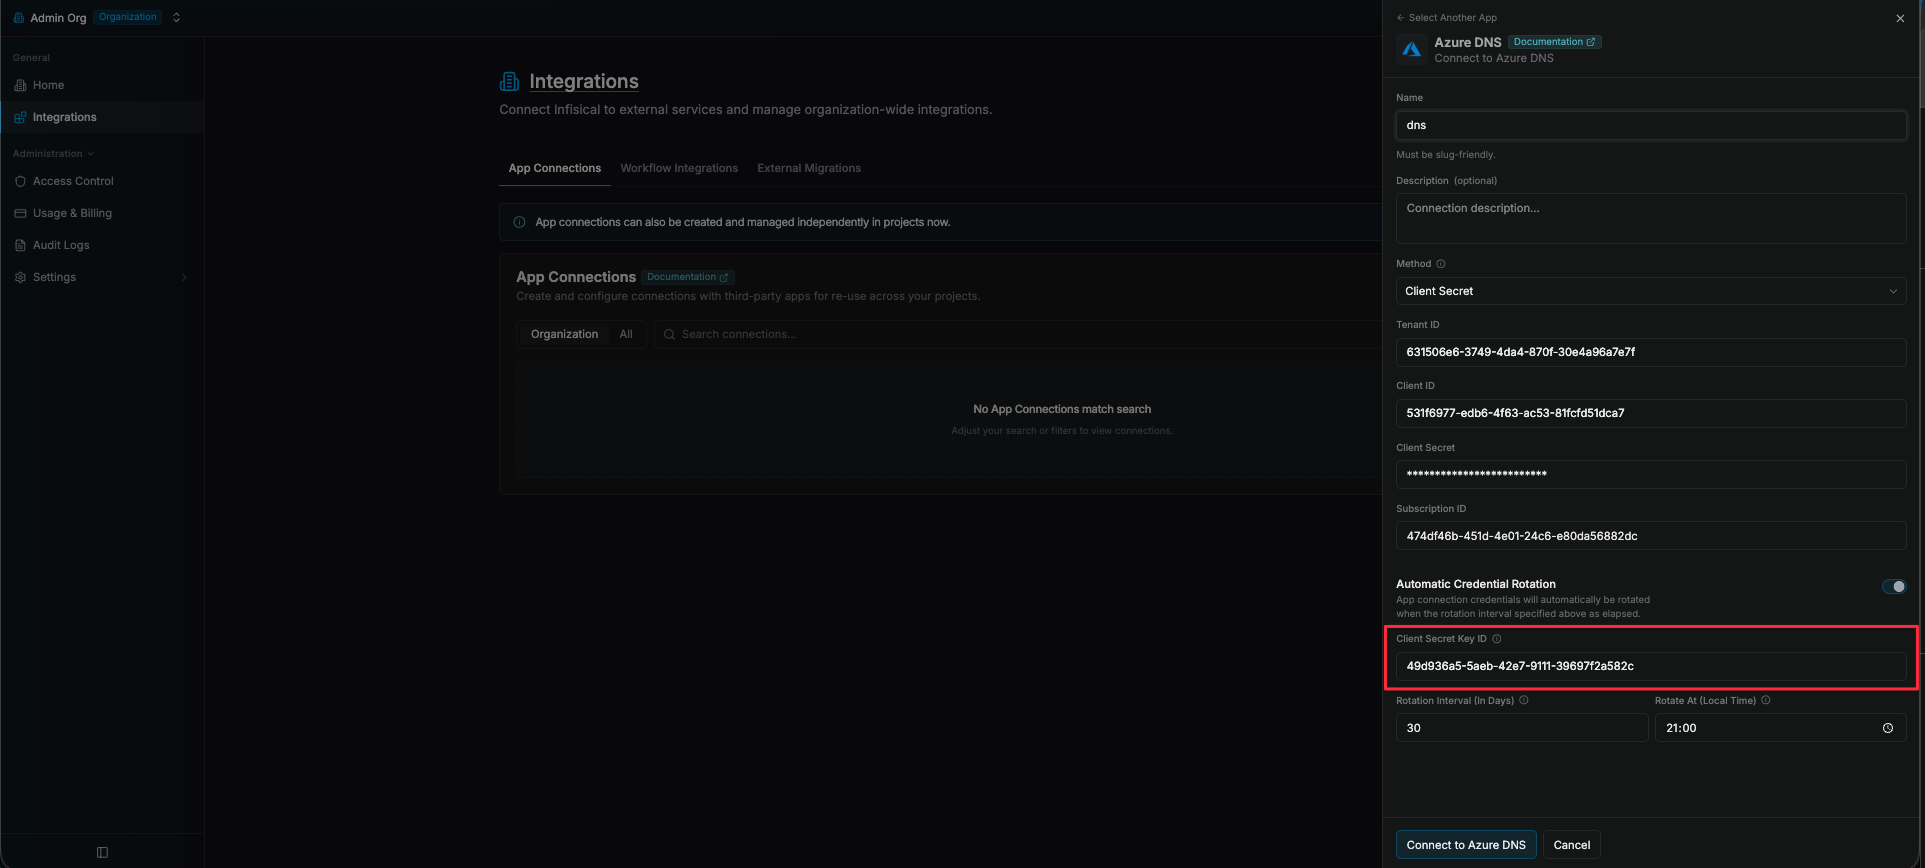 Set the **Rotation Interval** (in days) to define how often the credential should be rotated, and set **Rotate At** to the local time of day at which the rotation should occur.
* **Rotation Interval** - How many days between each rotation.
* **Rotate At** - The local time of day at which the rotation will be triggered.
Set the **Rotation Interval** (in days) to define how often the credential should be rotated, and set **Rotate At** to the local time of day at which the rotation should occur.
* **Rotation Interval** - How many days between each rotation.
* **Rotate At** - The local time of day at which the rotation will be triggered.